Lab 1 - EE 421L
Authored by Nick Repetti
08/25/2014
Lab Description:
This lab assumes that one has properly set up their Cadence environment, as seen in the tutorials here. This first lab will go through the first part of Tutorial 1 seen here. We will only be going up to the following image (the 25th image in the tutorial):
To capture screenshots, we will be making use of the snipping tool.
Lab Report:
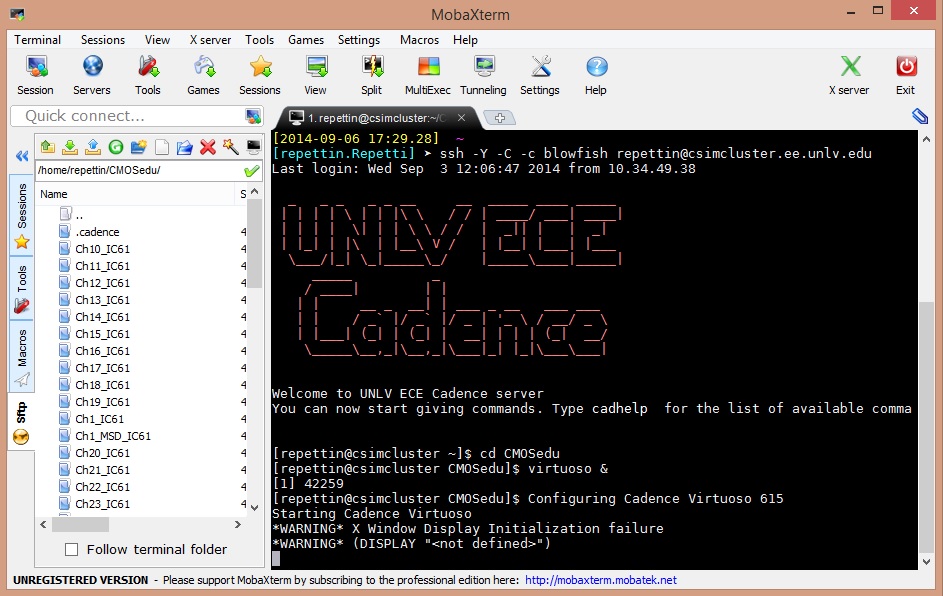
To run Cadence on Windows it is helpful to use MobaXterm. To begin, SSH into the server with the following command:
ssh -Y -C -c blowfish username@csimcluster.ee.unlv.edu
Change to the CMOSedu directory with the command:
cd CMOSedu
To start Cadence, type the following command (Note that the & symbol is used to run this command as a background process. This will be useful later when we want to continue to run commands without having multiple windows open):
virtuoso &
Cadence will now be loading and your MobaXterm should now look like this:
We will be creating a new Library to house our files. Go to the Library Manager and create a new Library by going to File -> New -> Library. Match the settings as seen below and then click OK:

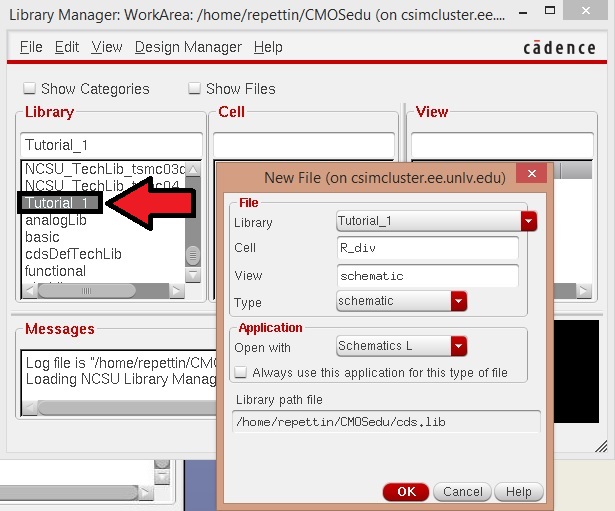
We will be creating a schematic for a simple voltage divider. We begin by making a new Cell View by clicking on Tutorial 1 and then going to File -> New -> Cell View. Match the settings as seen below and then click OK:
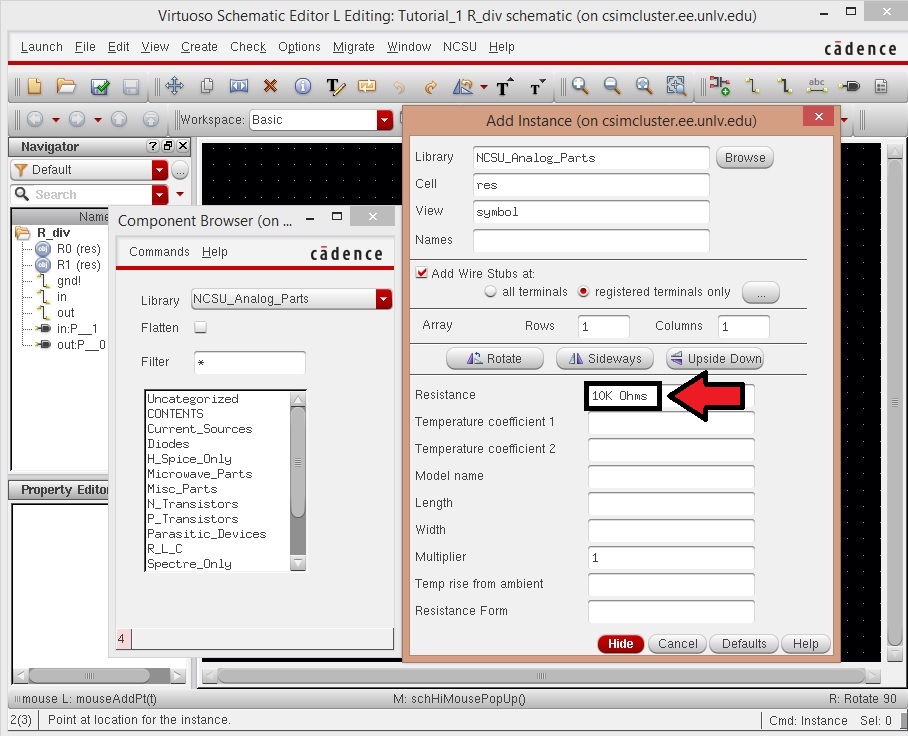
The schematic editor will open and we can begin editing. Press the hotkey 'I' to open the Add Instance window. This is where we will be selecting our components from. We will first be placing a 10k resistor. In the Component Browser, browse to the Library "NCSU_Analog_Parts" and navigate to "R_L_C". Select the resistor called "res" and then set the value to 10k. Your screen should be similar to the image seen below:
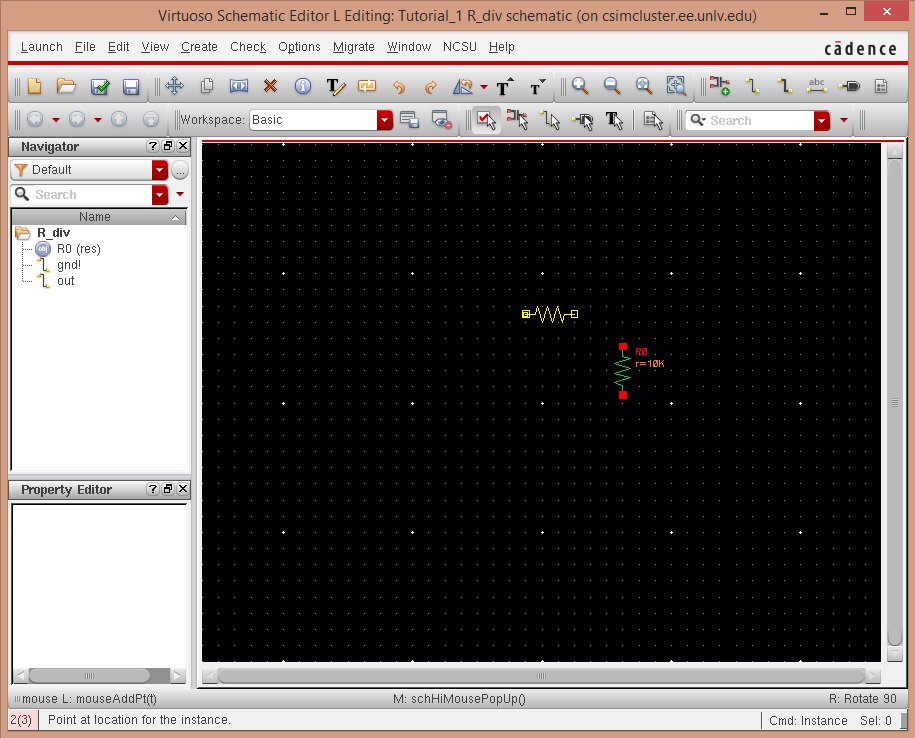
Click Hide on the Add Instance window and we can now place the resistor down by left clicking. Right click to rotate and add a second resistor into place as seen below:
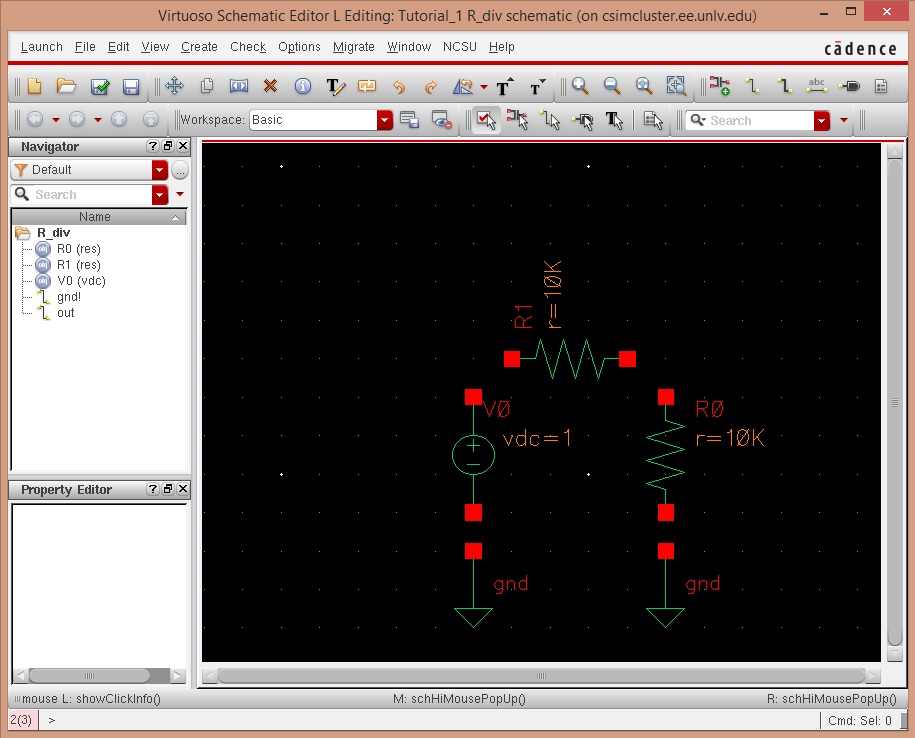
Press the hotkey 'F' to fit the schematic nicely into the window. We will now continue to add components by using the Add Instance window and then placing them onto the schematic. Place the following components, found in their corresponding libraries:
gnd: NCSU_Analog_Parts\Supply_Nets
vdc: NCSU_Analog_Parts\Voltage_Sources
Set the DC voltage to 1. Your schematic should now look like the one found below:
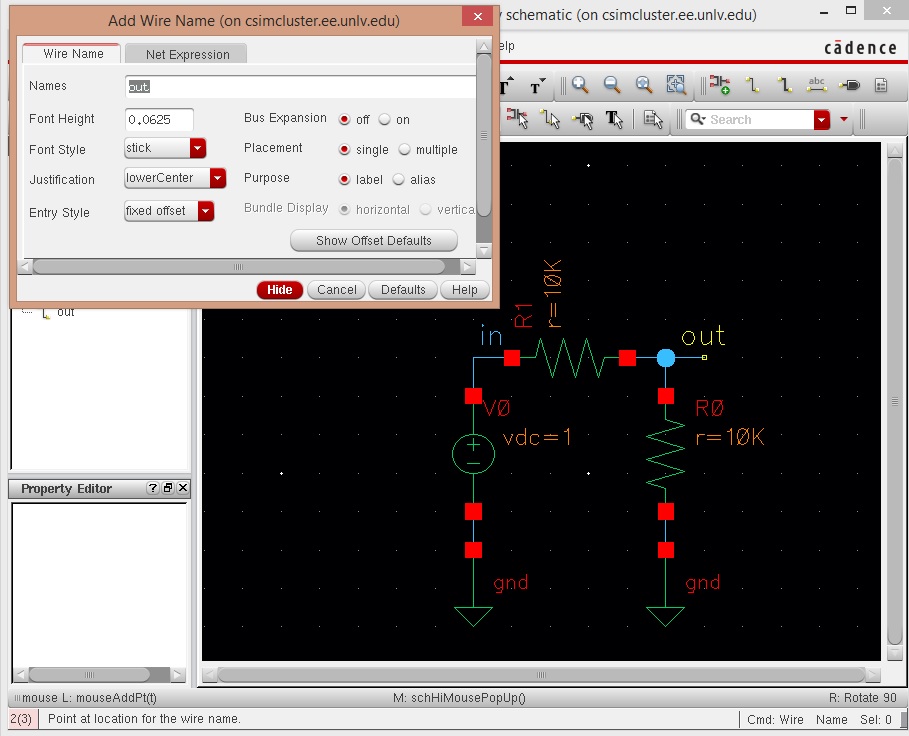
We will now add wires by pressing the hotkey 'W'. Begin by clicking on a node and then clicking again on another node to connect the two. Finish connecting all of the nodes. We will now add labels to the schematic. Press the hotkey 'L' to open the Add Wire Name window. Enter the name "in", press hide, and then place the label onto the schematic. Repeat for the label "out". Your schematic should look like the one below:
Our schematic is now complete and it is time to simulate. Let's start by doing a Check and Save. Click the Check and Save icon near the top of the schematic editor.

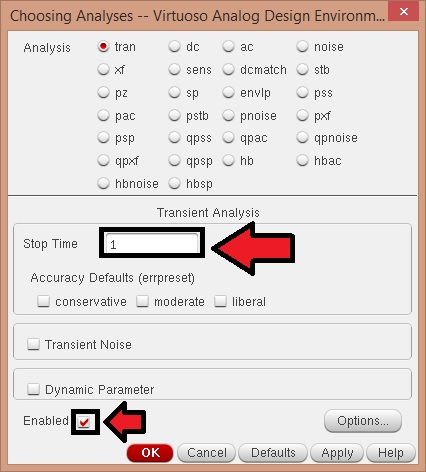
We are going to simulate with Spectre (Cadence's SPICE simulator). To do this, go to Launch -> ADE L. The Virtuoso Analog Design Environment will open. To setup our simulation go to Analysis -> Choose. Set your window up as seen below and then click OK:
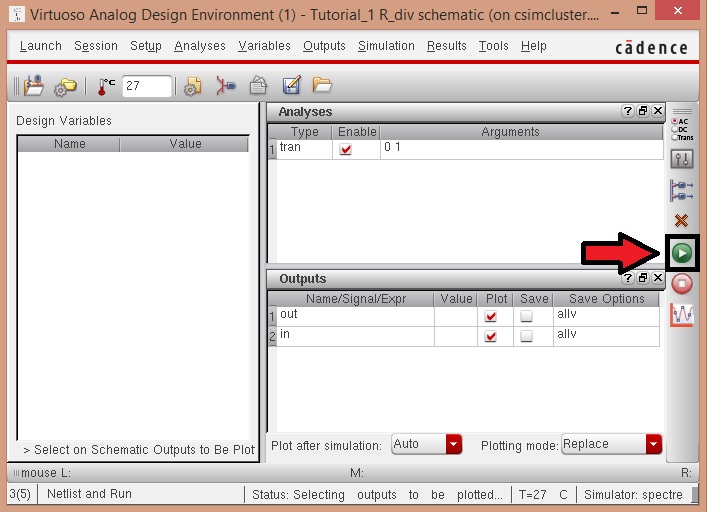
Now we will select which values we want to plot. Go to Outputs -> To Be Plotted -> Select on Schematic. The schematic window should now popup, if it does not simply bring it to the front. Click on the wires that hold our labels for "in" and "out". If you would like to save your simulation setup for future use, follow the directions in the tutorial. You are now ready to simulate and your window should look like the one below. Click on the green play button to begin the simulation:
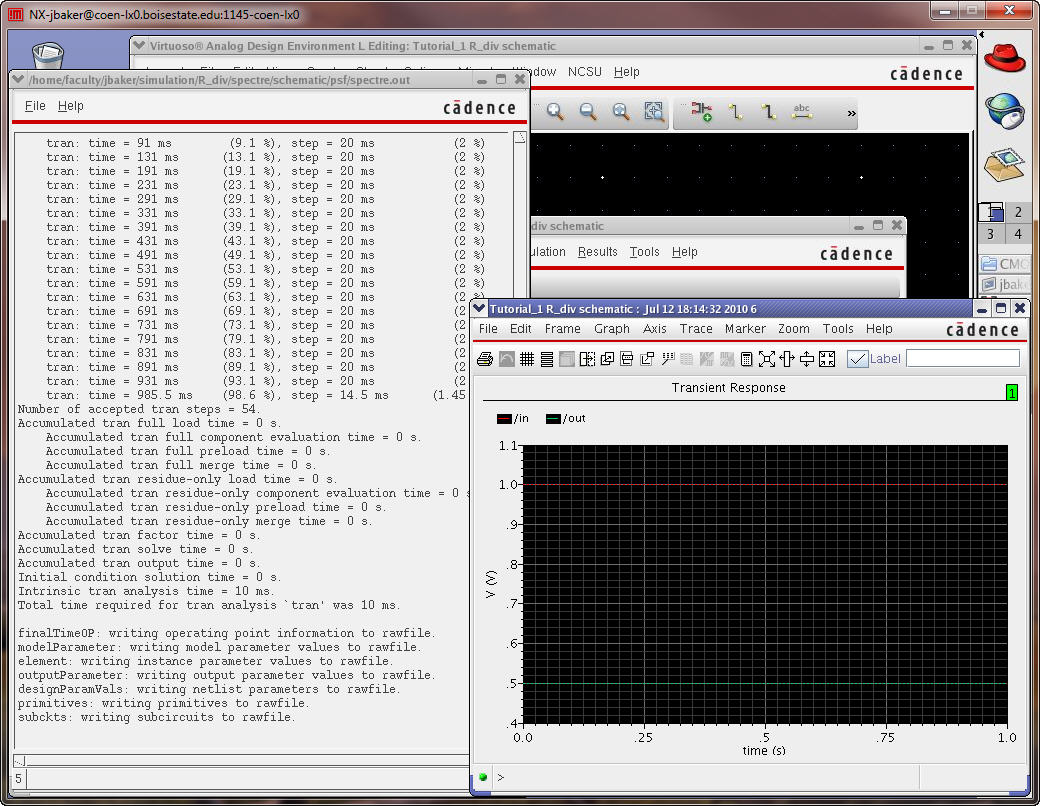
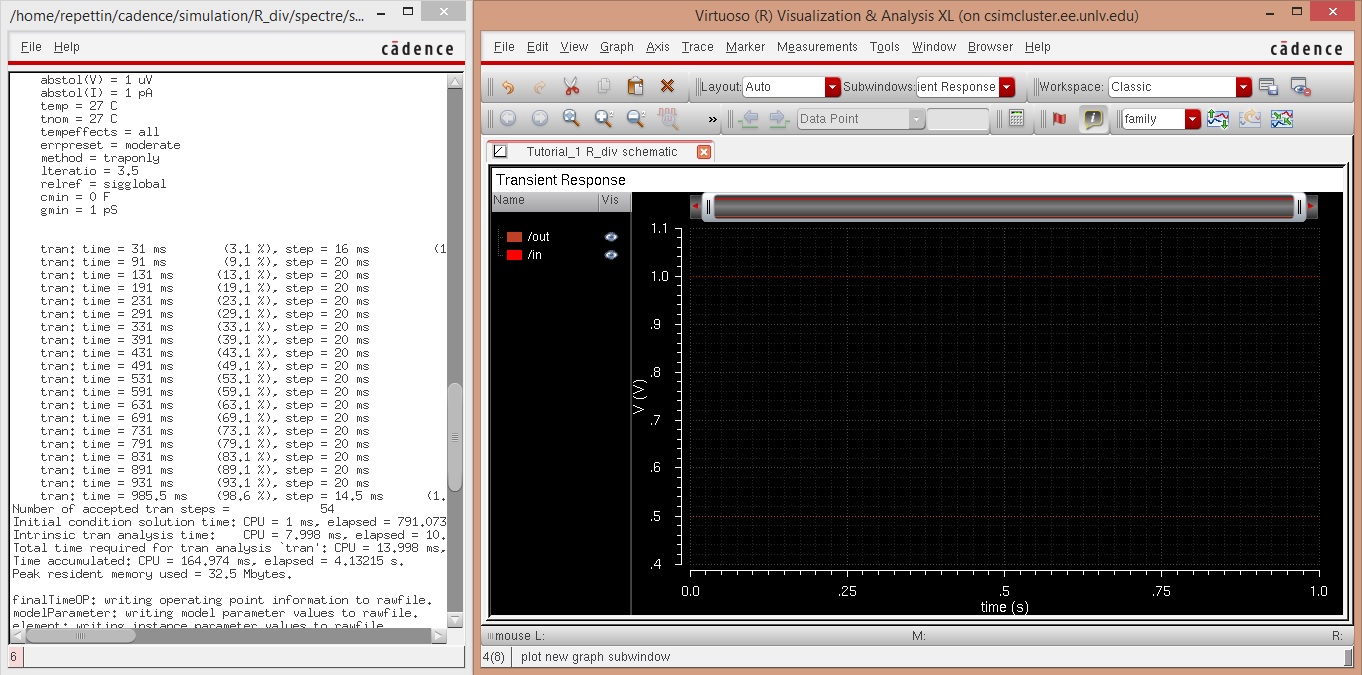
The following results windows should now popup:
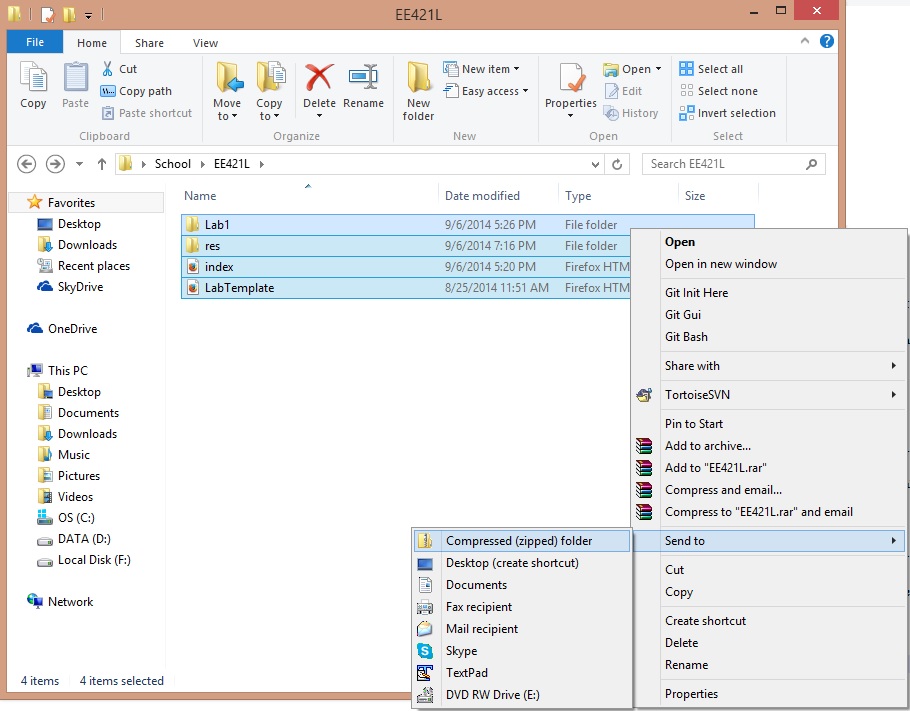
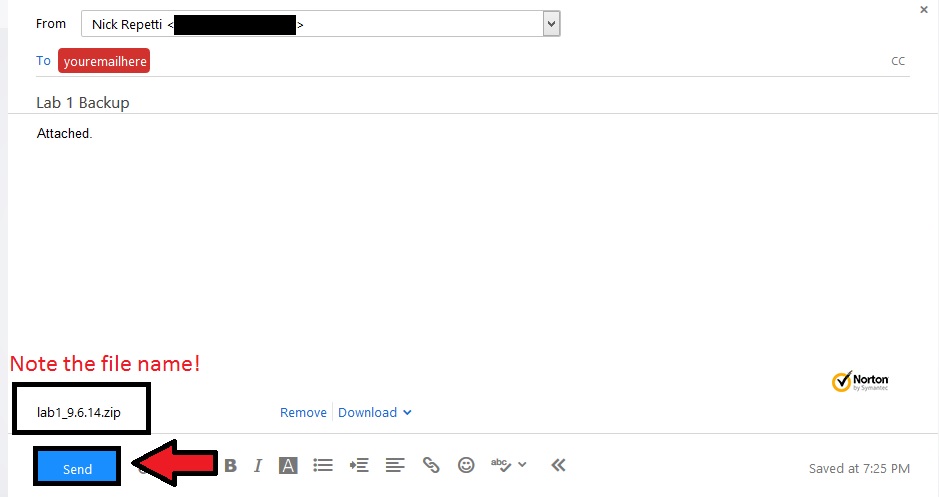
The lab is now complete, and it is time to backup our work. On your own machine (Not through SSH), go to the folder that contains your work. Select the items you want to backup, Right Click -> Send to -> Compressed (zipped) folder. Make sure to rename your folder so that the name contains the contents and date.
Finally, go to your favorite email client and email this zip file to yourself. Everything is safely backed up now!
Back