Editing Webpages at CMOSedu.com
A quick video overview of the material seen below is found at edit_webpage (13:20)
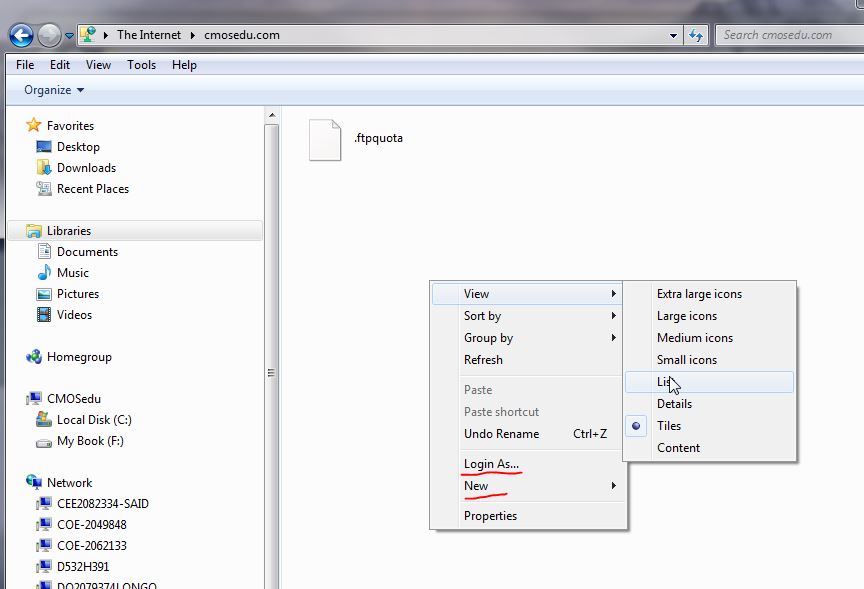
Notice, above, that you can use New to create a folder.
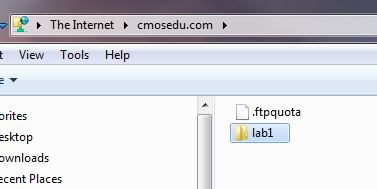
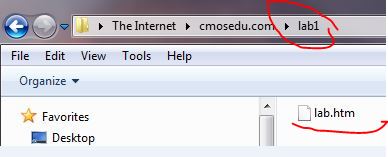
Create a folder called lab1 as seen below.
Copy lab.htm (right click on this link and use "Save link as") to your Desktop.
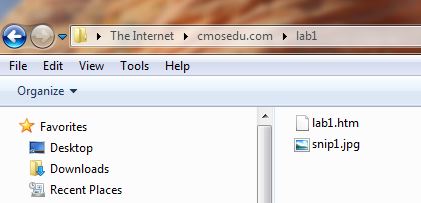
Drag the file from the desktop to the lab1 folder (open the lab1 folder by double clicking on it) as seen below.
This lab.htm file is a template that you can use for your lab reports or other webpages.
***Important side note, these instructions assume you will be editing the webpages directly as they reside on
CMOSedu.com. One other method of editing is to leave the lab (lab1) folder on the desktop and edit the pages
in this folder. When finished drag the entire folder over into the directory as described above. The drawback
of this approach is that it takes longer to FTP (generally not an issue). The benefits are that you can use "Open"
and "Save" instead of "Publish" (after publishing you have to close KompZer described below). Also, it's easier
to backup your work (zip up the information in the folder and email it to yourself [IMPORTANT!]). Also, instead
of using the full path to a figure, such as "http://cmosedu.com/jbaker/courses/ee421L/f13/students/jake/fig1.jpg"
you can simply use "fig1.jpg" since the htm file and figure are in the same folder on your desktop.***
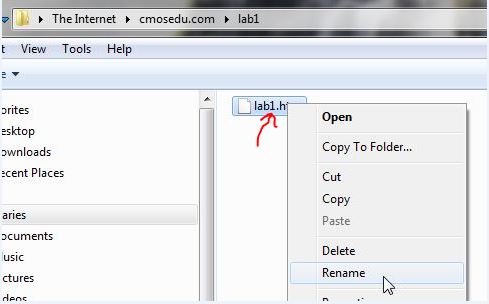
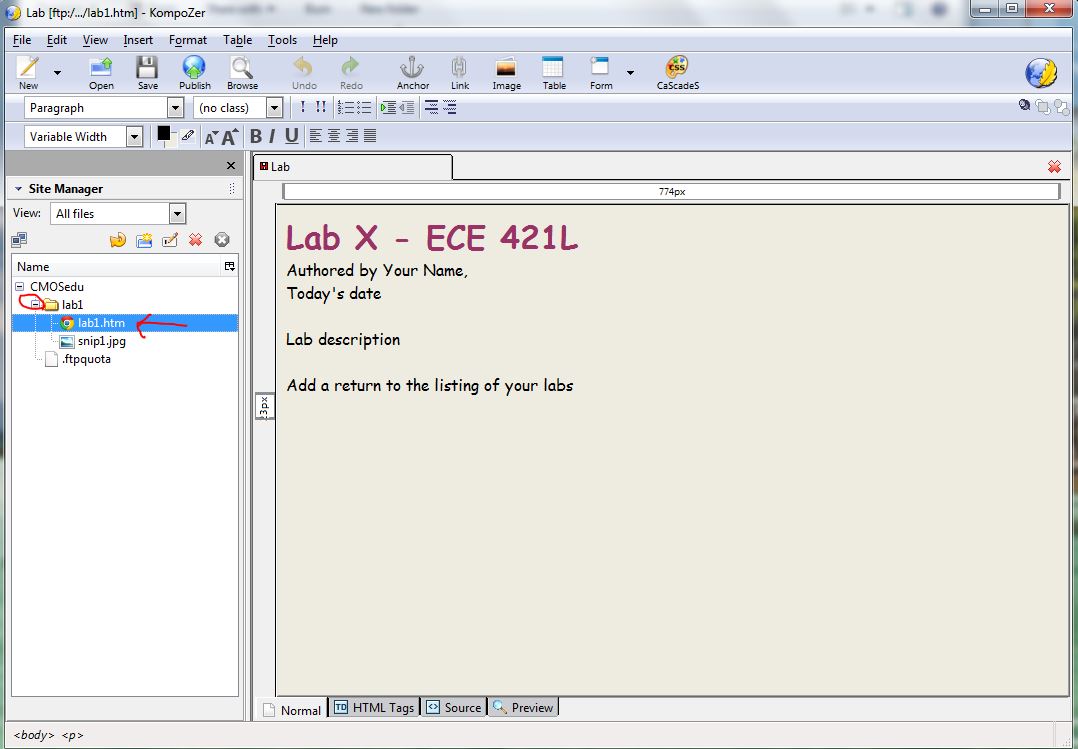
Right click on lab.htm and rename it to lab1.htm as seen below.
Before we talk about how to edit this htm page let's cover one more subject, that is, saving images.
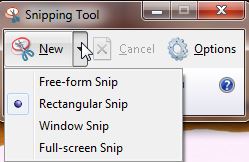
Using File -> Save As save this snippet as snip1.jpg to the Desktop.
Copy (drag it over into Windows Explorer) this image into the lab1 directory.
We are now ready to edit webpages but let's cover one last thing before move on, that is,
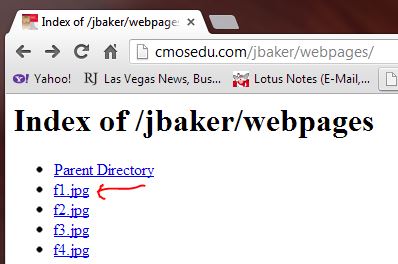
After the image is open the address can be copied from the web browser.


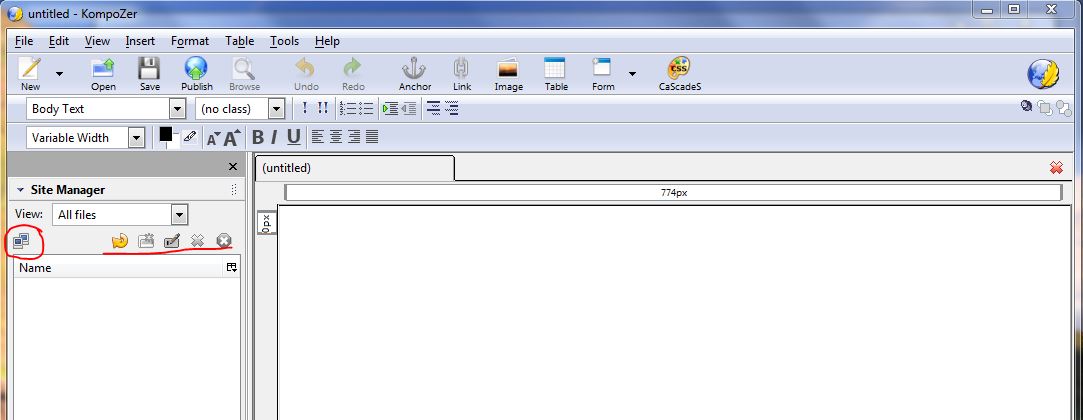
After KompoZer starts click on the "Edit sites" icon circled below.
Underlined below are some other useful icons, especially the arrow (which is Refresh).
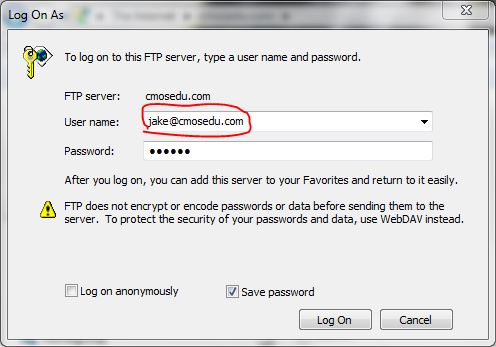
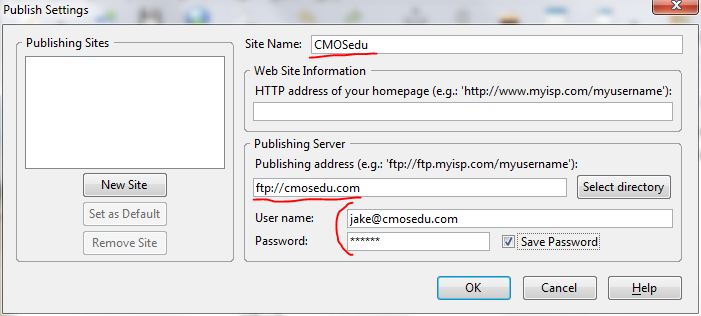
Enter the information seen below using your User name and Password.
When finished hit OK.
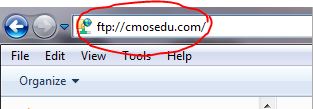
If you have problems try using ftp://ftp.cmosedu.com (add "ftp." in front of cmosedu.com).
Expand CMOSedu on the left as seen in the image shown below.
Double clicking on lab1.htm will allow us to edit it.
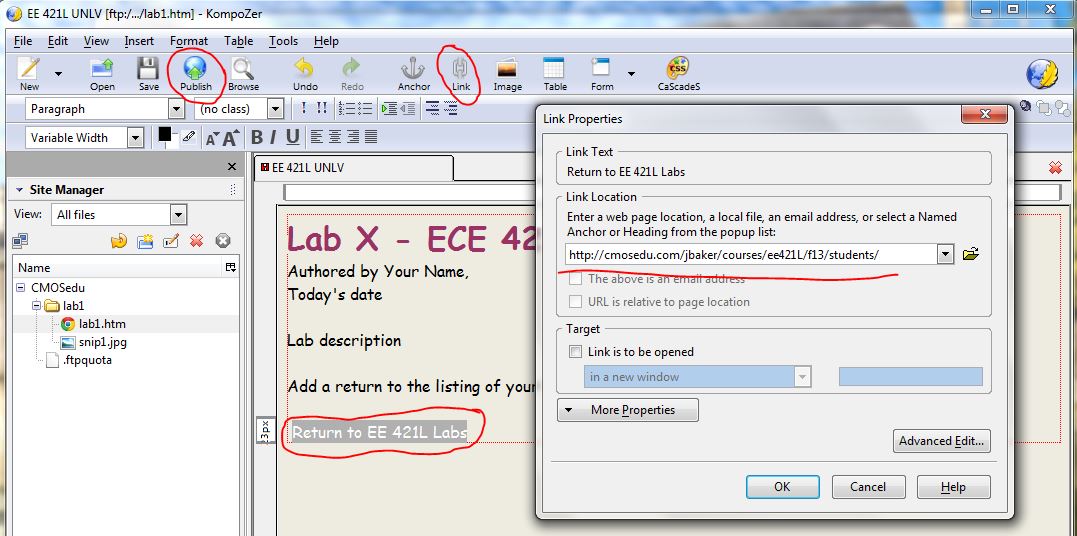
Let's add a link to a webpage.
Add the text "Return to EE 421L Labs" at the bottom of the page then highlight it, to select the location of the link, as seen below.
Next click on the circled icon "Link" and enter, for example, http://cmosedu.com/jbaker/courses/ee421L/f13/students/
Note that here you can select "Link to be opened" and set, for example, that the link opens in a new window. Hit OK.
Note that if you are typing a lot you shouldn't. Instead use Ctrl+C to copy and Ctrl+V to paste.
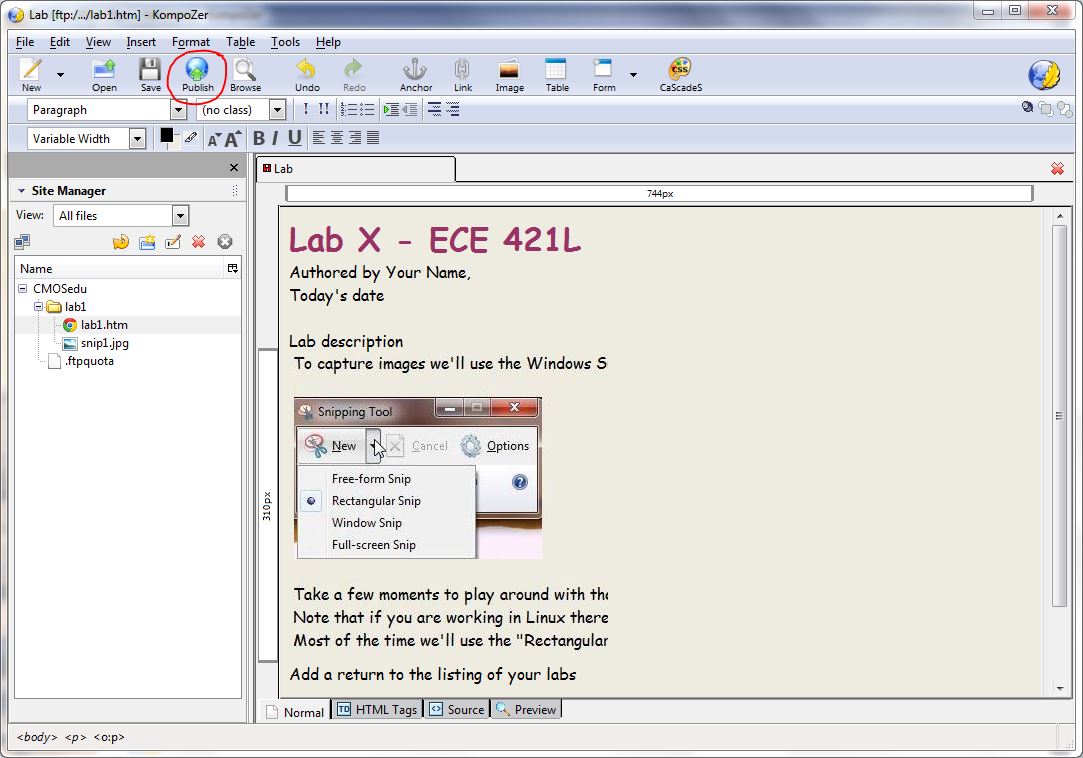
Finally, we can publish the page so the world can view it by pressing the circled "Publish" icon seen below.
After publishing the webpage close KompoZer.
You can continue using KompoZer but many of the functions may not be available.
If you would like to save your work more often then copy the lab1.htm file to your desktop and use "Open" and "Save."
When done editing copy the lab1.htm file back over into the Windows Explorer directory like you do with images.
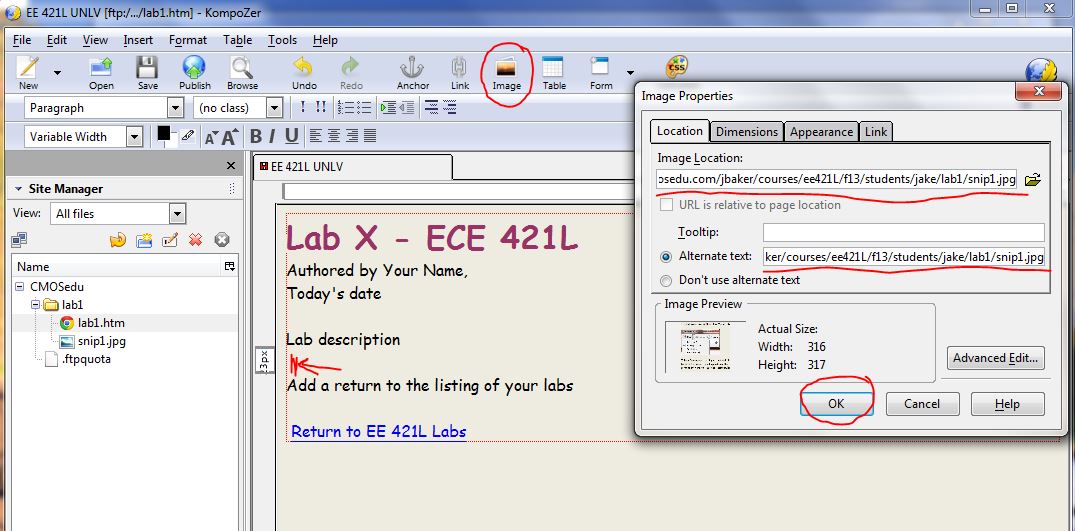
Let's, next, add an image.
Navigate, per the instructions given above, to the snap1.jpg image in the lab1 directory.
Copy the location from the web browser using Ctrl+C.
Insert your cursor at the point seen below indicated by the red arrow.
Next click on the circled "Image" icon seen below (again, if it's not selectable re-start KompoZer)
Paste the location of the image, using Ctrl+V, in the two locations seen below then hit OK.
The alternate text entry is for text-only browsing (if somebody actual does that nowadays ;-)
It might be good to play around with the dimensions, appearance (changing size), adding a link to the image, putting a border around the image, how
the text wraps around the image, etc available in this dialog box.
The result is seen below.
At this point, if you haven't already done so, publish the webpage and use your web browser to see how it looks,
http://cmosedu.com/jbaker/courses/ee421L/f13/students/jake/lab1/lab1.htm
Note that sometimes, if you add a blank line, you have to add a space in the blank line for it show up (a bug? perhaps an artifact of html?)
***Important side note, these instructions assume you will be editing the webpages directly as they reside on
CMOSedu.com. One other method of editing is to leave the lab (lab1) folder on the desktop and edit the pages
in this folder. When finished drag the entire folder over into the directory as described above. The drawback
of this approach is that it takes longer to FTP (generally not an issue). The benefits are that you can use "Open"
and "Save" instead of "Publish" (after publishing you have to close KompZer already described). It's also easier
to backup your work (zip up the information in the folder and email it to yourself [IMPORTANT!]). Also, instead
of using the full path to a figure, such as "http://cmosedu.com/jbaker/courses/ee421L/f13/students/jake/fig1.jpg"
you can simply use "fig1.jpg" since the htm file and figure are in the same folder on your desktop.***
One thing that we are not covering in detail is the use of tables.
Tables are really easy to use and are very helpful when displaying data.
To add a table to your webpage click on the "Table" icon.
Take a moment to add a table to your webpage.
Play around with what you can do with tables (change the number of rows or columns, add/delete rows and columns, the alignment of information in a
cell of the table, alignment of the table on the page, etc.
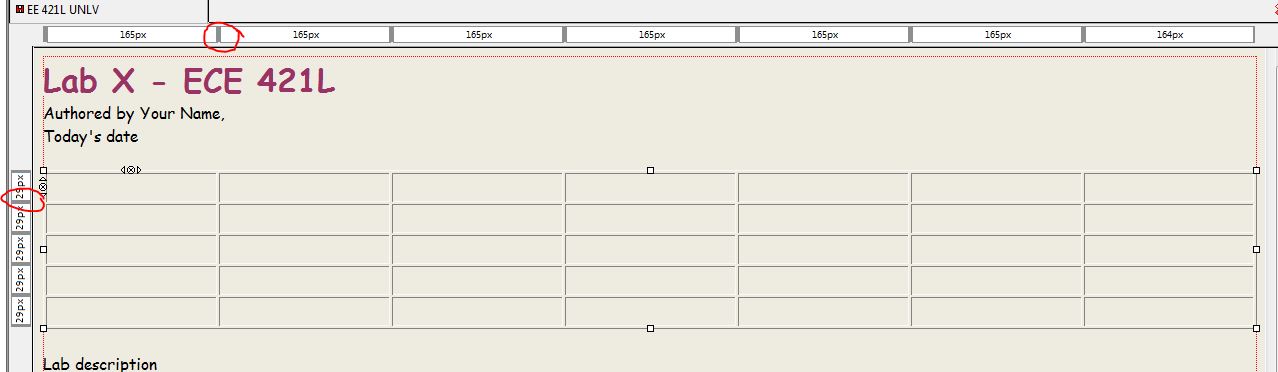
Note that the column and row size is adjusted by sliding the circled segments left/right or up/down in the rulers seen below.
Finally, you can add a title to your webpage, e.g. Lab 4 EE 421L Fall 2013, and add an author under the format menu (Format -> Page Title and Properties...)
There are many other things you can do; however, this is the end of the tutorial.
The information presented here should be more than enough to get you going ;-)