Lab Description:
The purpose of this lab is to become accustomed to editing HTML files and posting HTML
files to the CMOSedu website. Using the file explorer and the KompoZer program we will
be uploading all of our labs to the CMOSedu website. This lab demonstrates how to create
a circuit using Cadence, and simulating it.
Prelab:
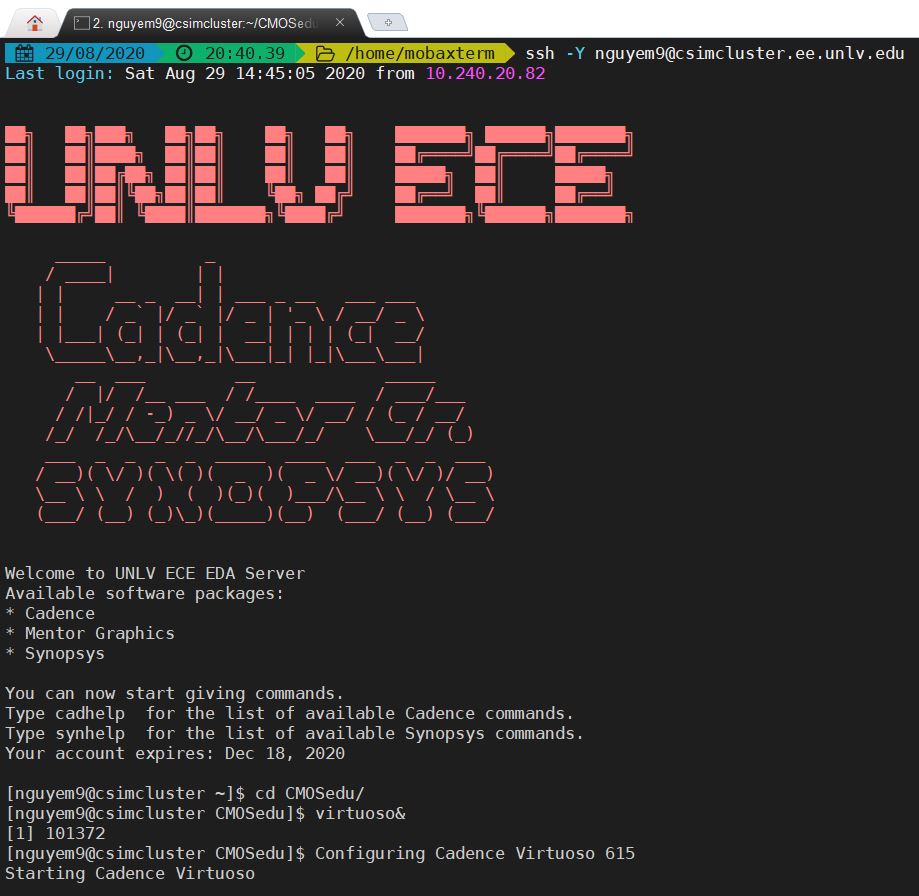
Log in to the terminal.
Change the directory to CMOSedu using 'cd CMOSedu/ '
Start Cadence with 'virtuoso&'
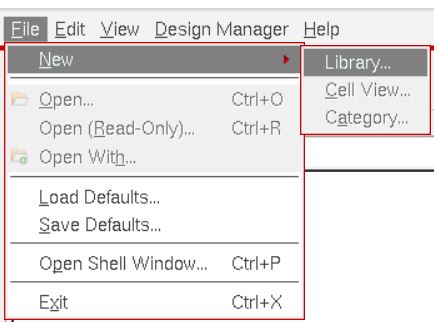
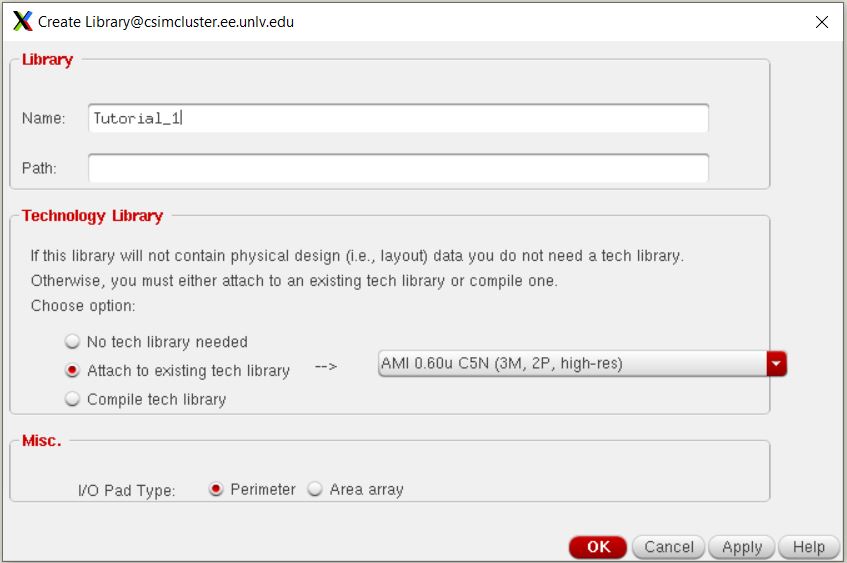
Next creating a library by going to File > New > Library and naming it 'Tutorial_1', after that I attach AMI 0.60u C5N (3M, 2P, high-res)
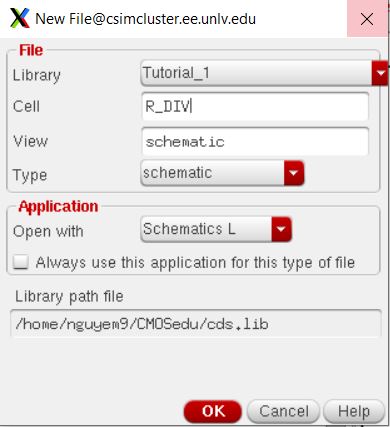
Creating a new cell by going to File > New > Cell View and naming the cell 'R_DIV', this will be used to create and simulate our voltage divider.
After that a schematic editor will open. Using the bind key 'I' opens up the instance window navigating to find 'NCSU_Analog_Parts' library 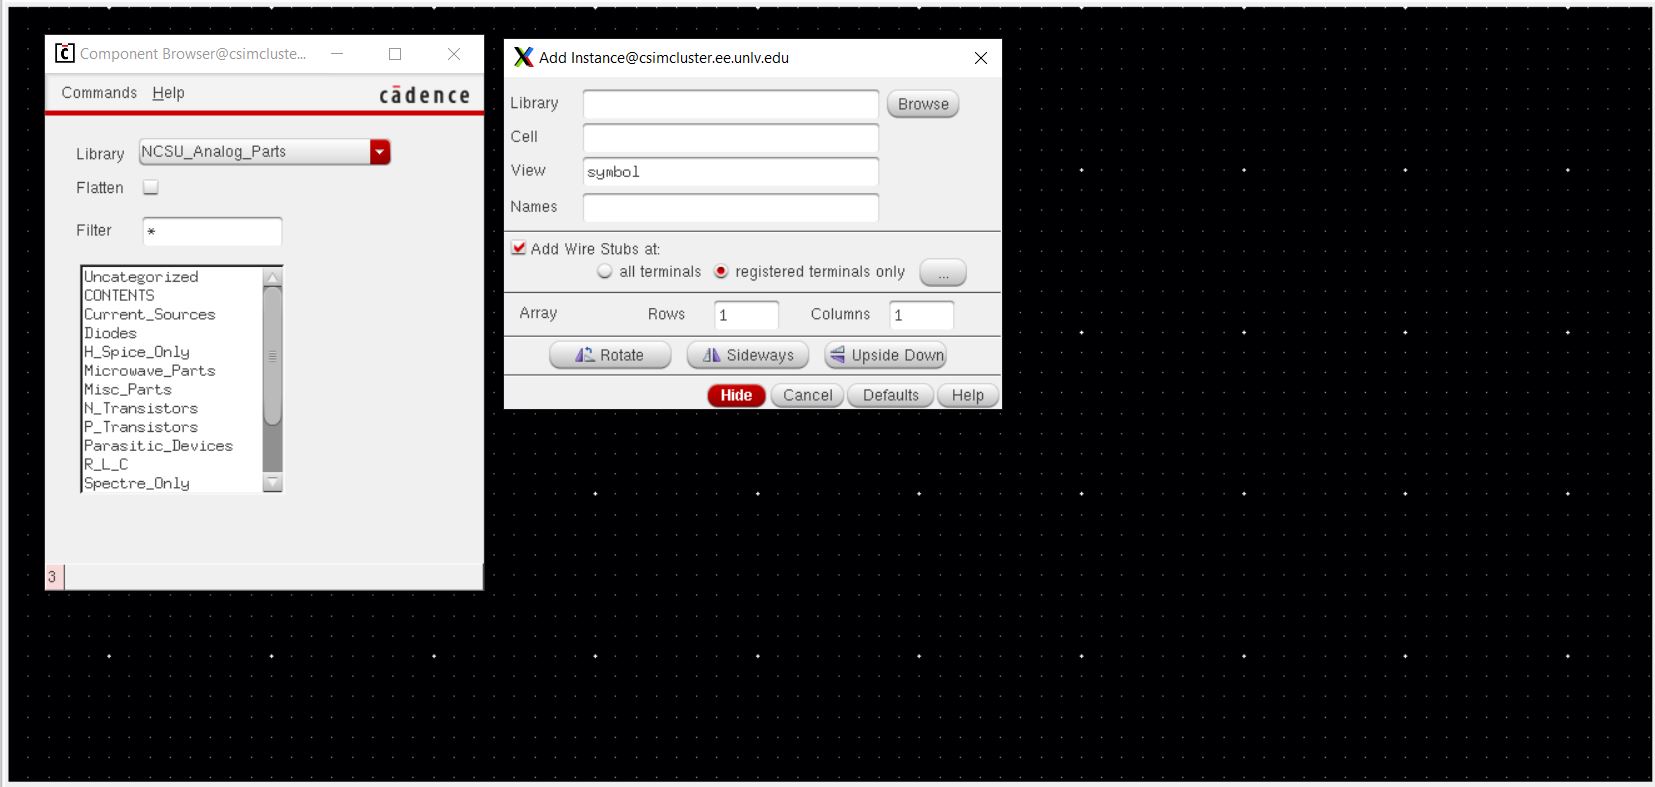
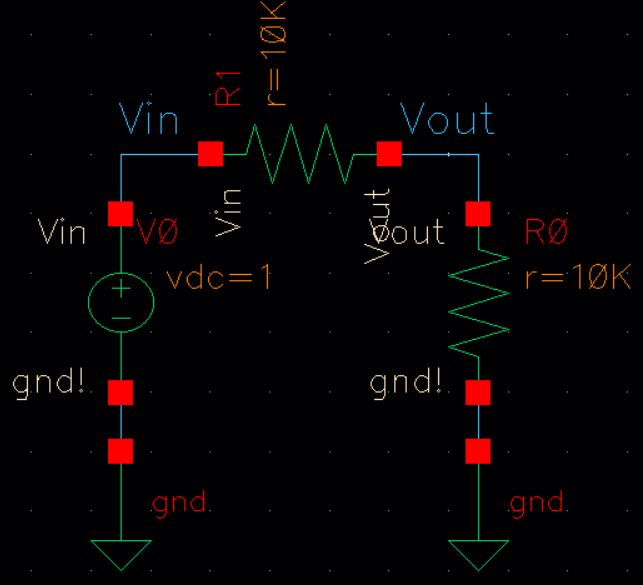
This is the finished schematic.
Setting up the simulator, going to Launch > ADE L, going to Setup> Directory/Simulator/Host and setting it to Spectre, then clicking on analysis> choose, selecting tran, setting the stop time for 1 second, finally clicking on Output> To Be Plotted> Select On Schematic and selecting Vin and Vout.
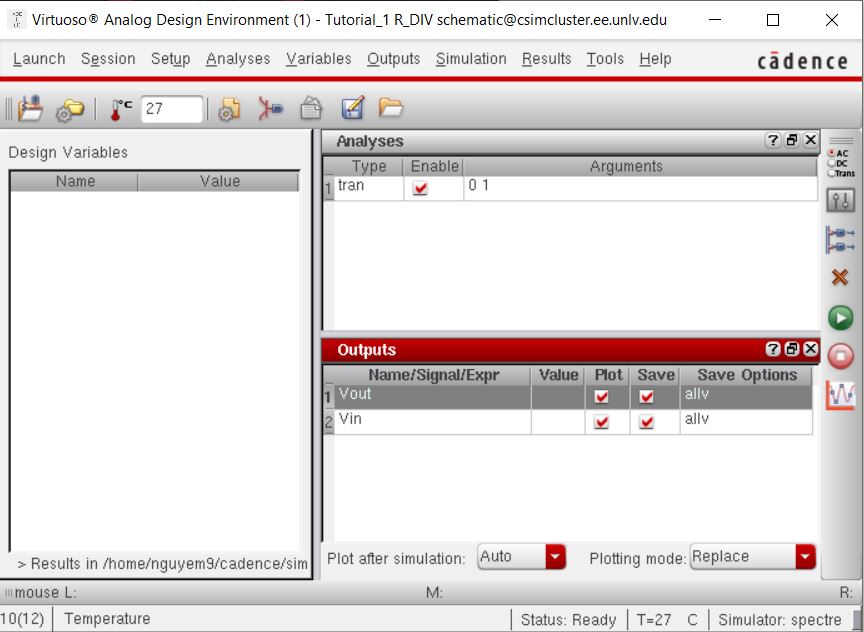
After that press the green play button, the simulator outputs the transient response with Vin at 1V and Vout at 0.5V.
![]()
Back-ups:
It's good to back-up your work to make sure you still have it in case a mishap happens.
I back up my work by putting it into a file and uploading it to Google Drive.

.