Lab 1 - EE 421L
For Lab 1, I will be going through a tutorial on how to use Cadence on the MobaXterm application.
Then the Cadence will start to run and Library Manager window will pop up along with a command window. If the Library Manager window does not pop up, then click on the Tools tab and Library Manager. When the Library Manager window opens up, click on the File tab, New, and Library. Then type in the name Tutorial_1 and click OK. Once that is created, select Tutorial_1 under the library and click on the File tab, New, and Cell View. Then name the new file R_div and click OK.

A black schematic should pop up. For this file, the schematic below is to be created. In order to find the components needed, click on the Create tab and Instance (or bindkey I). When finding the components, make sure to browse in the NCSU_Analog_Parts library and change it to the correct values, if applicable, and wire then together by clicking on binkey w.

When everything is set up on the schematic, Check and Save it. If there are no warnings, it is ready to go. Once it is ready to go, click on the Launch tab and ADE L. The following window should pop up.

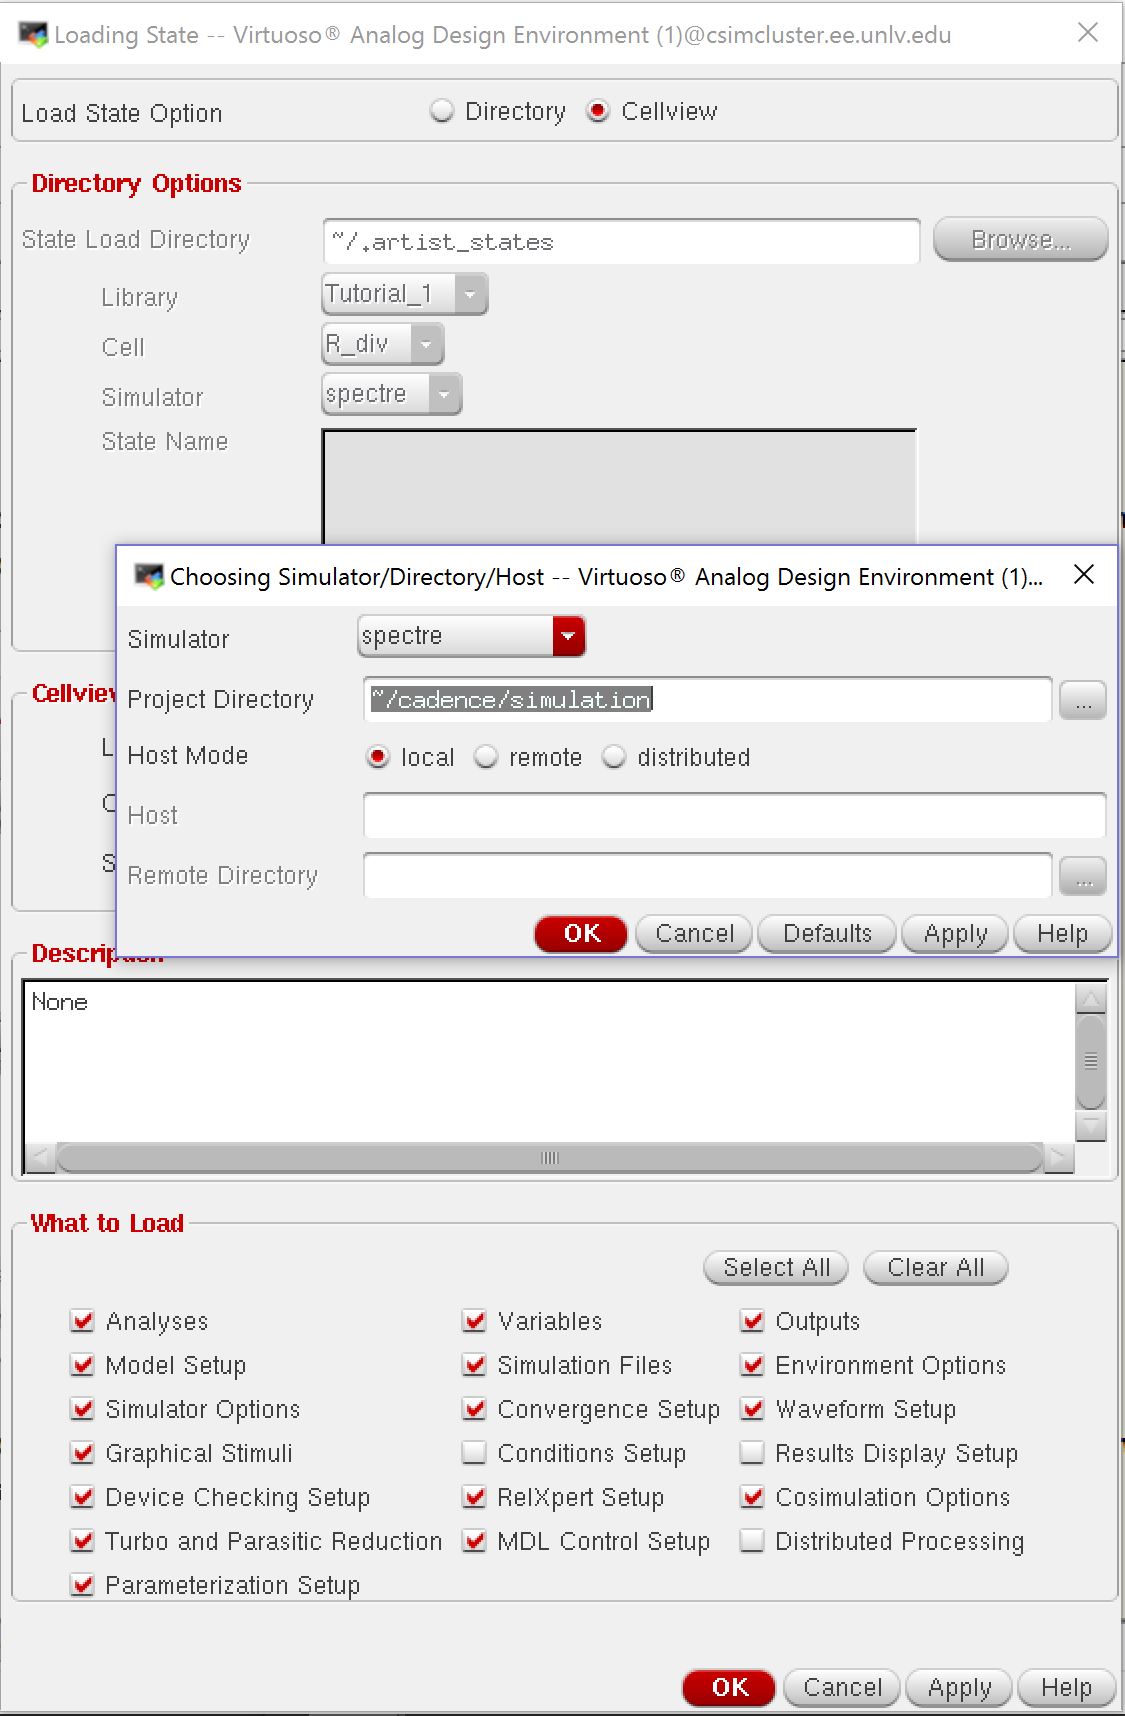
As seen below, click on the Setup tab and Simulator/Directory/Host. Make sure that spectre is selected in the Simulator. Also click on the Session tab and Load State. The Cellview should be selected in the Load State Option. Click OK in both windows.
Everything is ready to be run by click the green button with the arrow inside to receive a netlist and run the simulations to get the results as shown below


When I am finished with my lab reports, I will back it up into my student drive.

I will also back it up into my UNLV Google Drive.