Lab 3 - ECE 421L
Authored
by Matt Mumm, mummm2@unlv.nevada.edu
Today's
date 9/13/2013
Make sure to save and backup often!
Pre-Lab
- Finish Tutorial 1 seen here.
Lab
description
Today we will be creating the layout of the R2R resistor used in the 10-bit DAC.
Open electric and create a new layout cell to get started.
Create a layout
- First we will need to create a single resistor using N-RWell under components ->mocmos.
- You will need to set your length and width based on how big you want the resistance and MOSIS rules.
- You can find the MOSIS scalable CMOS rules here.
- Example:
You want a 10k resistance, your min width is 12 and R/sqr is 800/sqr.
So, 10k/800=12.5sqrs If we set the W=15, L=15*12.5=187.5.
Remember these are all in Lambda, not nm or um.
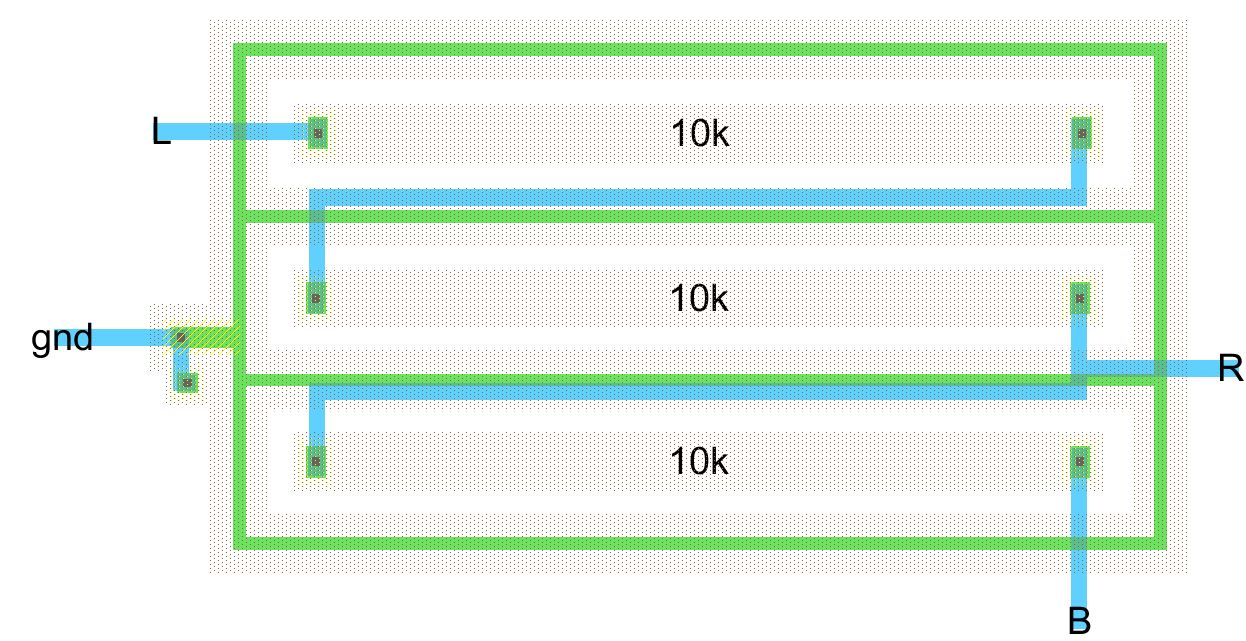
- Notice
to save space, the resistors are lined up in parrallel in the Y
direction. Some space is needed between the resistors so as not
to cause any parasetic problems.Again, the amount of space required can be found in the design rules.
- (Optional)
We created a P+ ring around each resistor and grounded it. This reduces
the amount of noise reaching the resistors.
- After all the resistors are connected via metal-1, then we can route or export (ctrl+e)
the inputs and outputs. Make sure you are clicking the node, not the
arc. If you accidently click the arc and try to export, it will
give you an error.
Layout of your R2R parrallel resistors should look something like this.
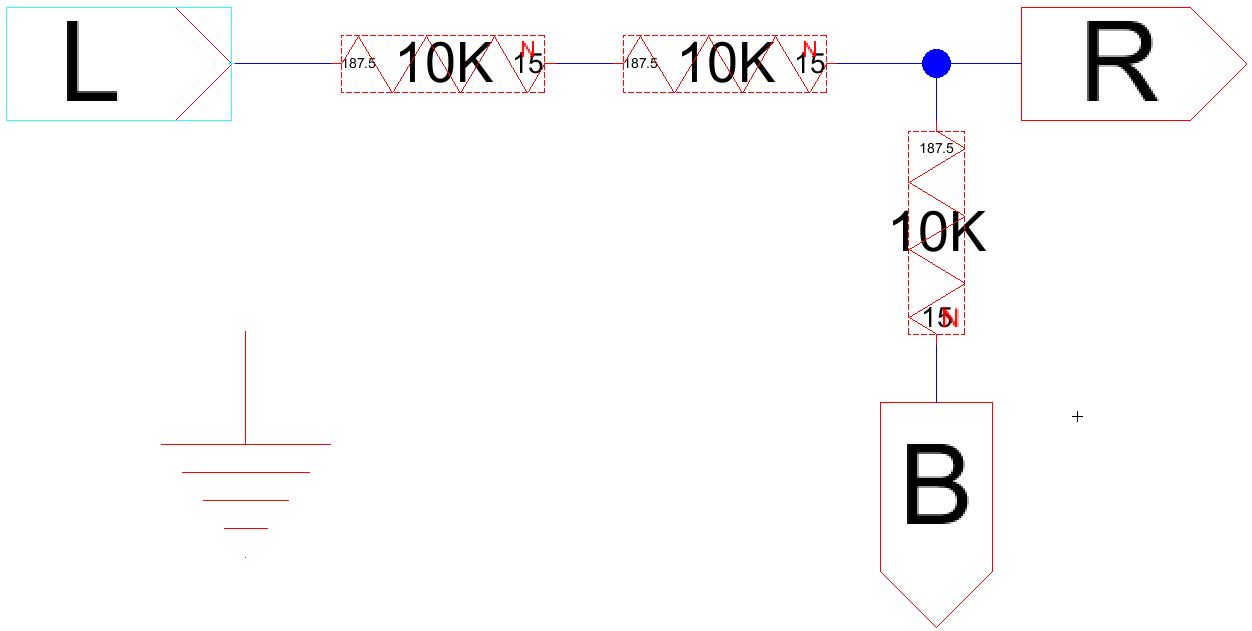
Create a Schematic
- The schematic needs to match the layout resistive values & size and inputs & outputs.
- Notice that in the layout there is a ground and we have placed a ground inside the schematic.
- You can set the length and width of the resistor by going into its properties.
- The resistor used here is an N-Well.
The schematic should look something like this.
Create an Icon
- You must create an icon for your schematic and layout. While viewing your schematic, hit View -> Make Icon View.
- Draw
your icon how you want it to appear with input and outputs. If
you got a connection to ground, just go ahead and delete it.
Your icon should represent your R2R resistors.

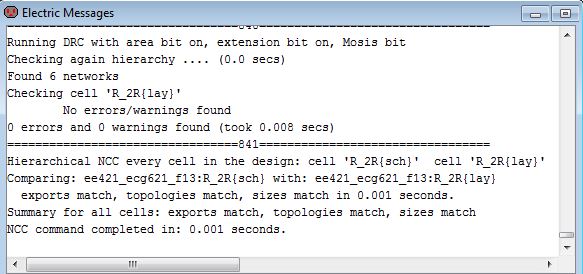
Be sure to check for errors before you try to simulate. NCC, ERC and DRC.
- Now you will want to place your icon 10 times into your 10-bit DAC and reconnect all the routes.
- Part of it can be seen above.
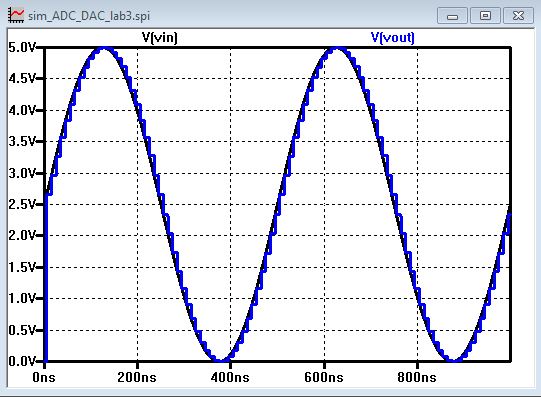
- Place your new DAC into the sim_ADC_DAC and run it.
The output is exactly the same as from the previous lab.
Be sure to backup your work. I like to use dropbox.

My Jelib File
More information can be found at cmosedu.com