Help
Starting a Remote Desktop for UNLV Students
The UNLV Design Software page is found here.
Request an account,
via email, from Dr.
Greg from your UNLV email account (important).
Ensure
you supply, with the email request, your student ID number and the
course you
are
taking
or, if you are doing research, your advisor's name.
After
receiving the new account username and password, before the
account can be
used,
you
need to change the password.
To
set your password download terminal client PuTTY
to
your desktop.

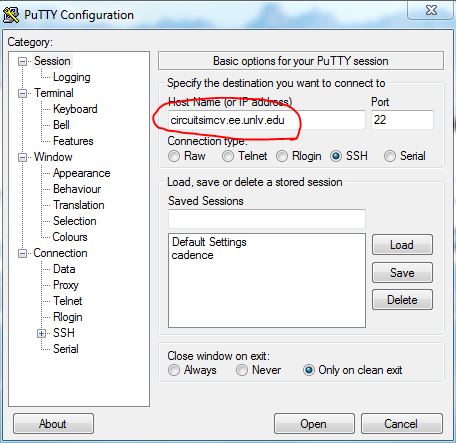
Double
click on PuTTY to start it and then enter the Host Name: circuitsimcv.ee.unlv.edu
as seen below.
After
hitting Open the following will appear.
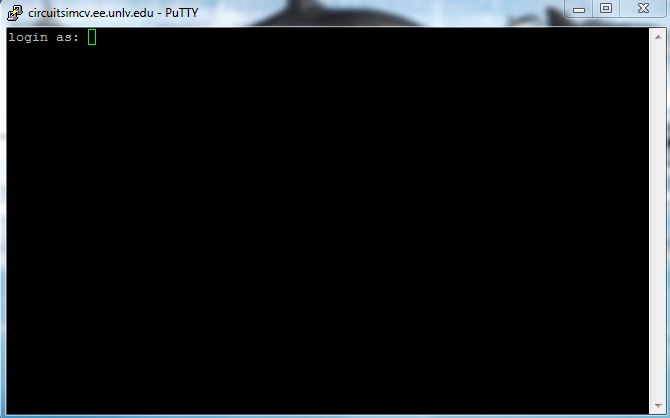
Use
your username and password to login.
You
will need to change your password, as seen below.
The
new password must be at least 8 characters and contain at least: one
uppercase,
one digit, and one special character.

Okay,
we are now ready to download, install, and use the remote desktop.
Older
version of the remote desktop installation is here.
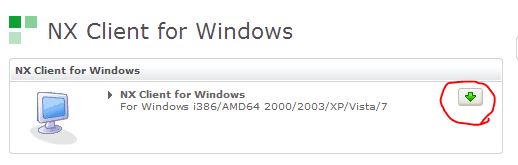
Download
and install NX
Client for Windows (NOMACHINE).

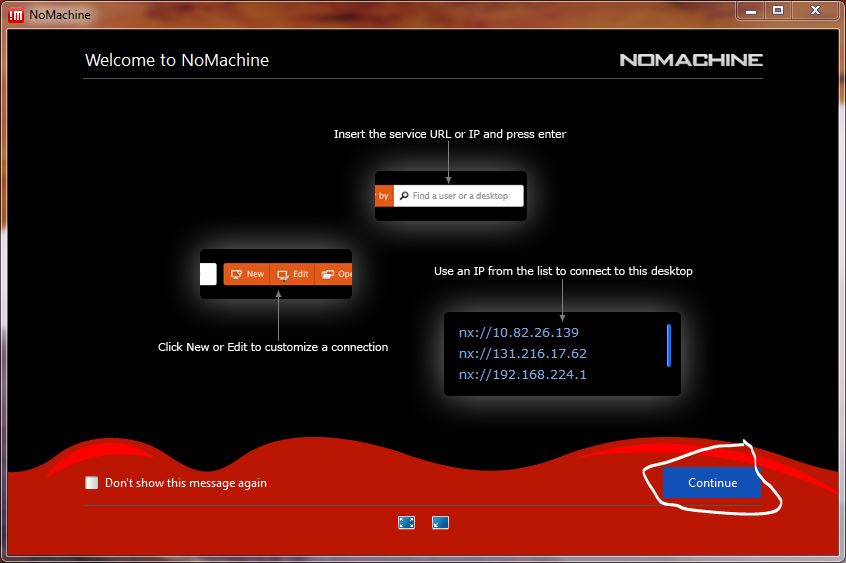
An opening screen will appear, hit the Continue button.
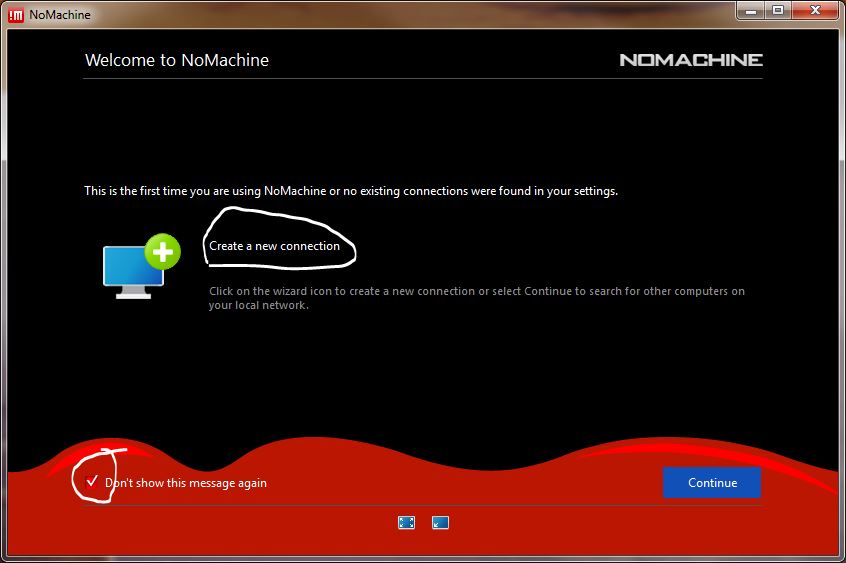
Select "Create a new connection" as seen below.
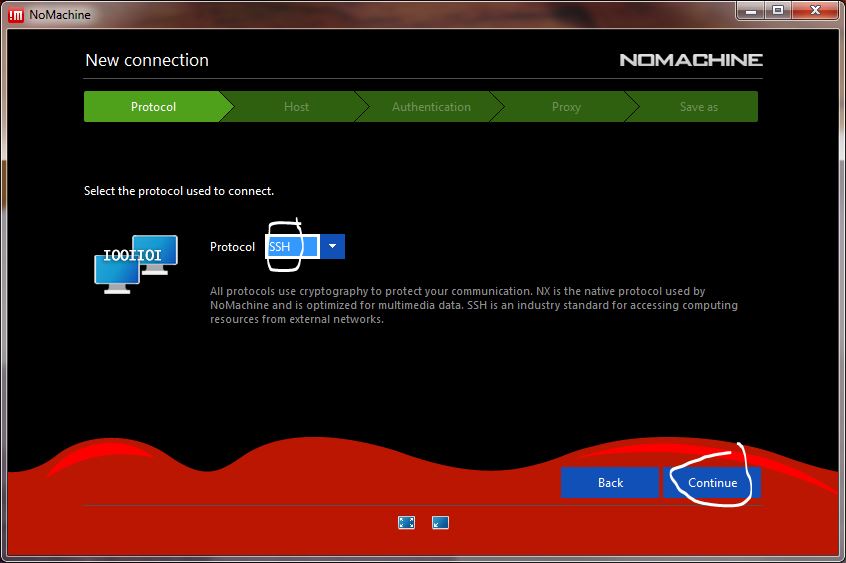
Set the Protocol to SSH and hit the Continue button.
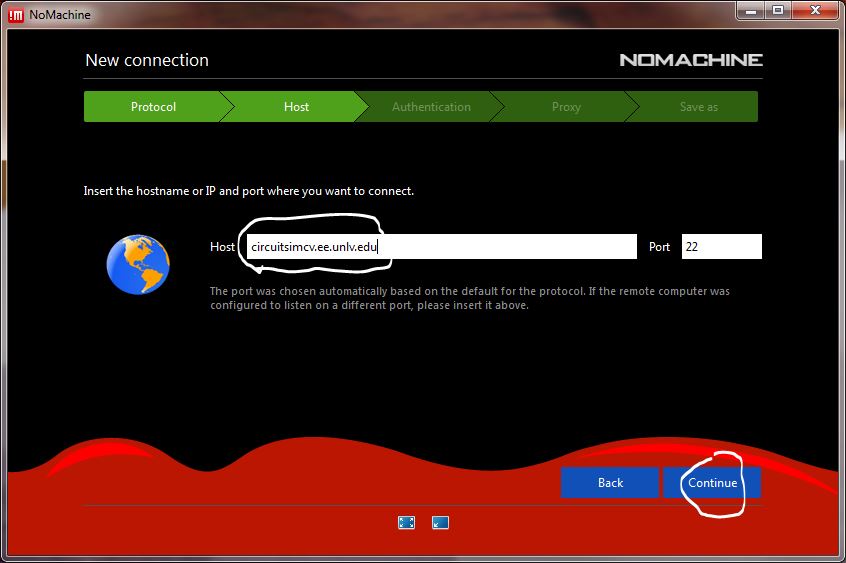
Set the Host to "circuitsimcv.ee.unlv.edu" and hit the Continue
button.
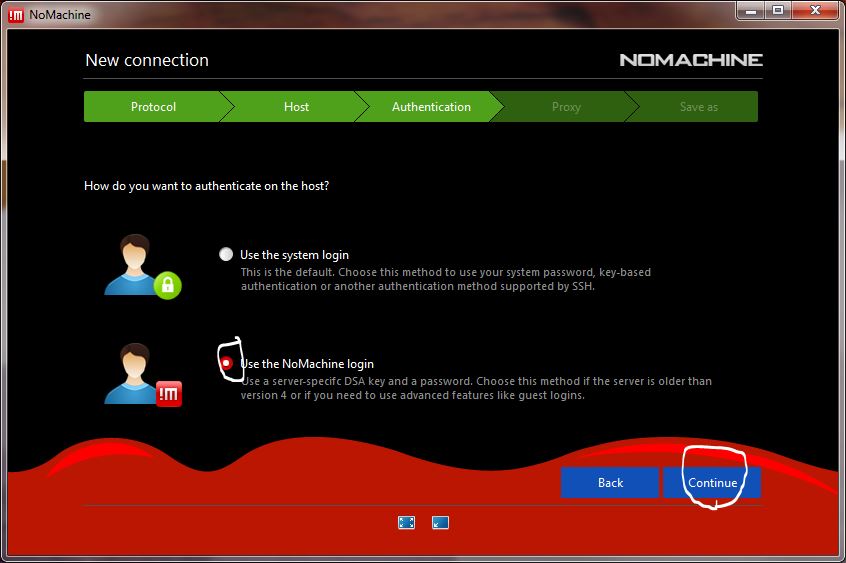
Select "Use the NoMachine login" and hit Continue.
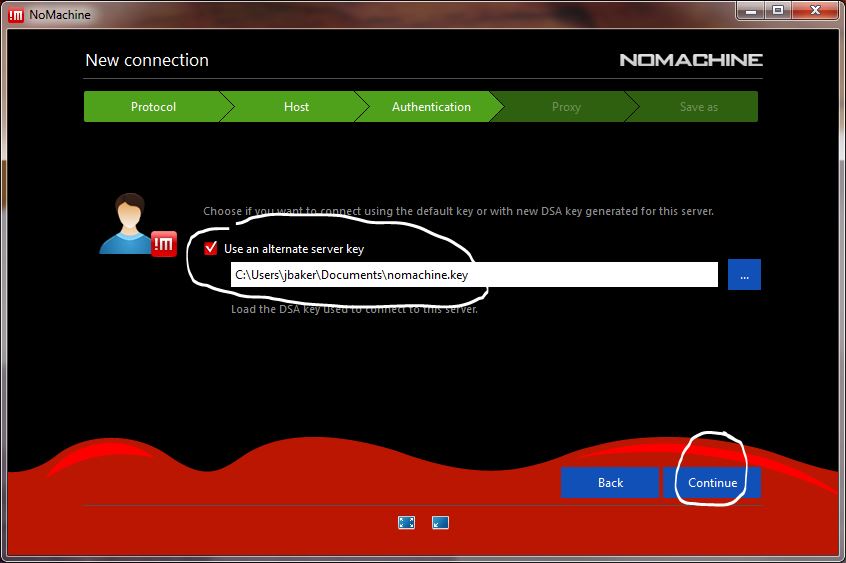
Download the nomachine key file, nomachine.key
(right
click to "Save As").
Save this file somewhere safe where it can be read each time you start
a remote
desktop.
Hit Continue.
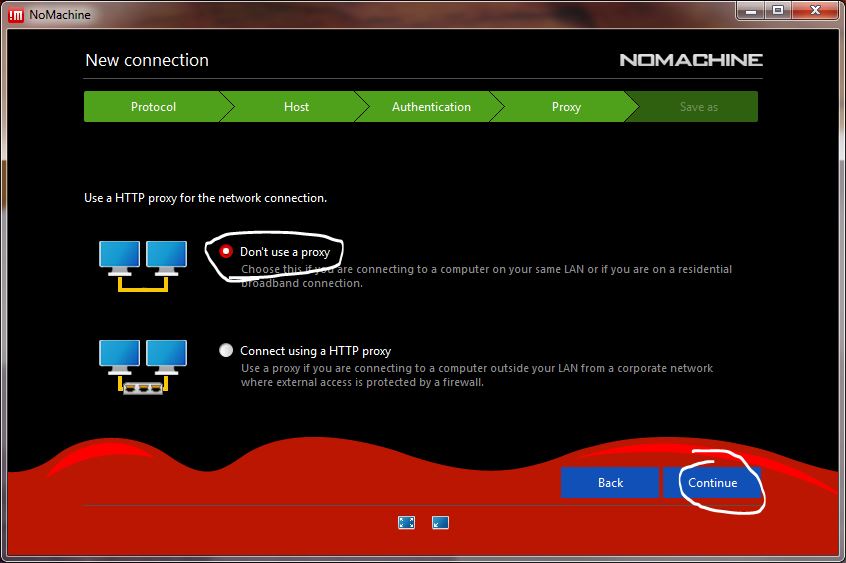
Select "Don't use a proxy" and hit Continue.
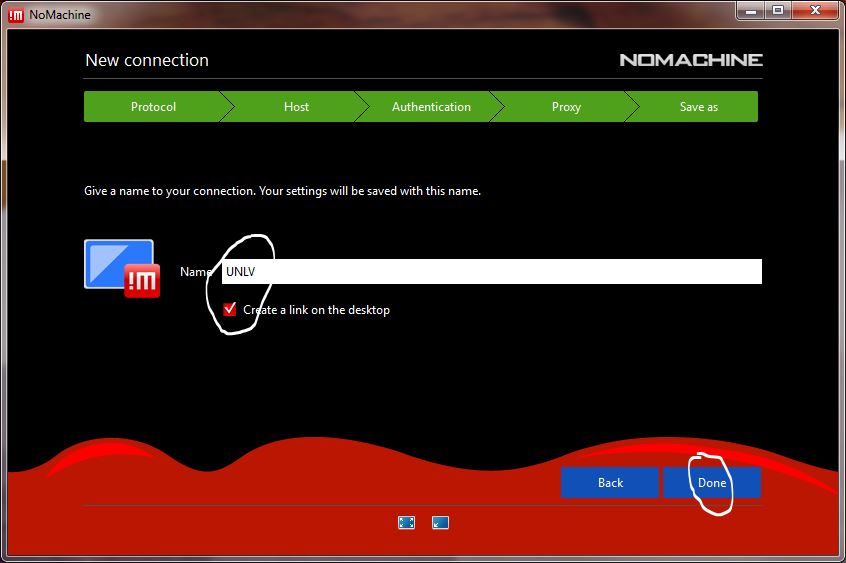
Name your connection and, if you want, create a desktop icon.
Then hit the Done button.
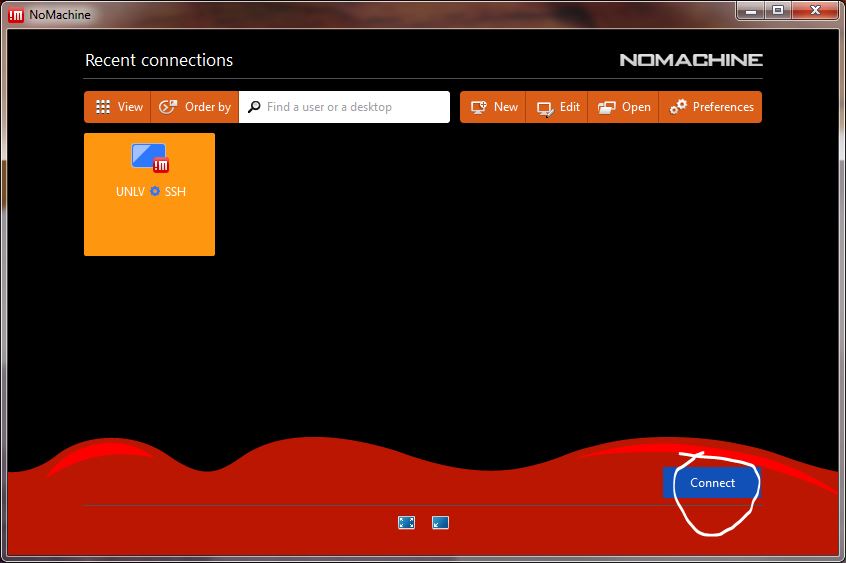
Select the "Recent connections" icon, as seen below, and hit Connect.
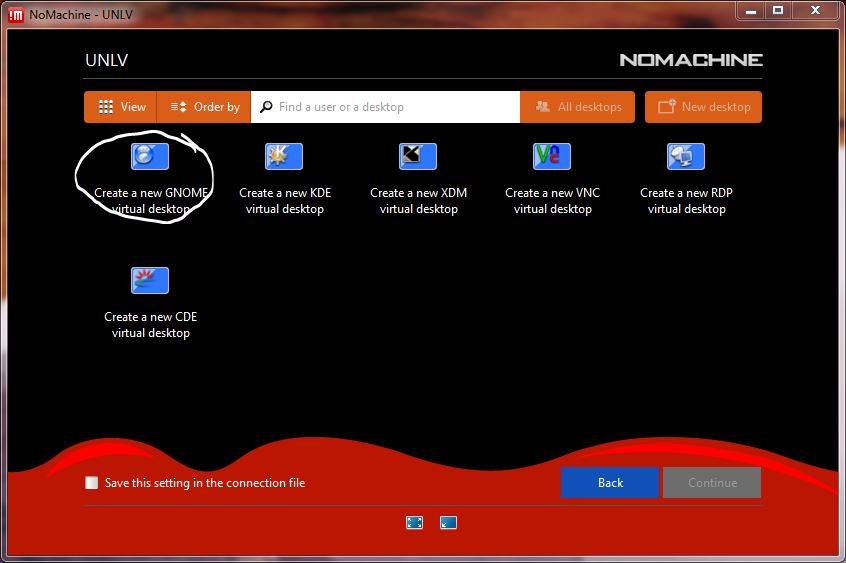
Double-click on the GNOME virtual desktop to start the remote desktop.
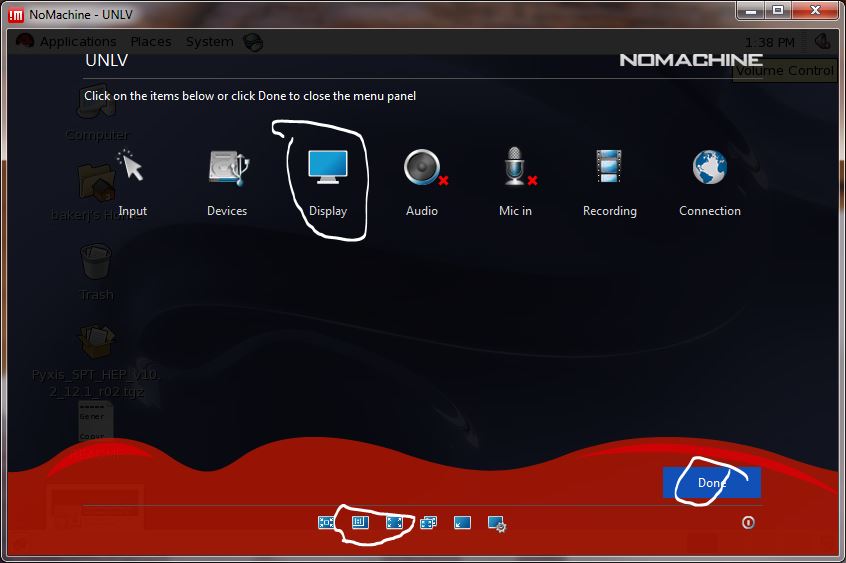
Select Display to adjust the display settings (e.g. full screen, or
something
smaller).
The
circled two small icons at the bottom maximize the desktop.
Note
the minimize icon at the bottom (second icon from the right).
To
access this screen when running the desktop move the mouse the top left
corner
to "peal down" the window (this is unusual).
Older remote desktop instructions.
Download
and install NX
Client for Windows (NOMACHINE).
Start
NX Client for Windows.
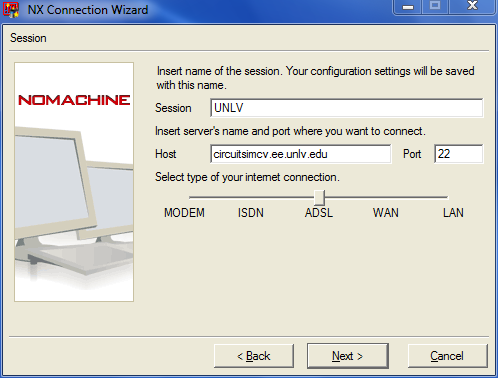
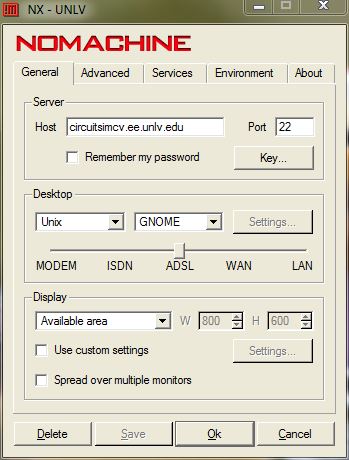
Set
the session name to, for example, UNLV and set the host to
circuitsimcv.ee.unlv.edu
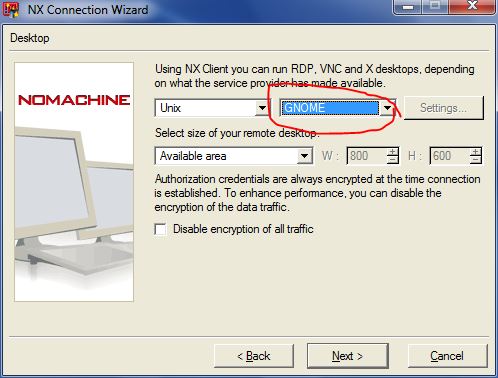
Set
the following.
We
need to set one more important parameter and verify we set the others
to the
correct values.
Select
the Configure button when starting NOMACHINE.
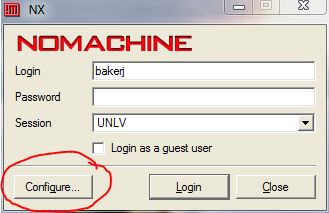
Verify
the following values are what you are using.
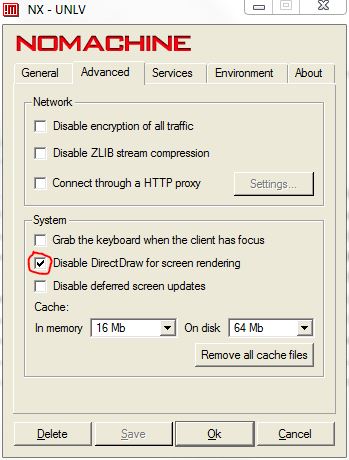
Select
the Advanced tab and set the following.
If
you don’t disable DirectDraw the display may be unreasonable slow.
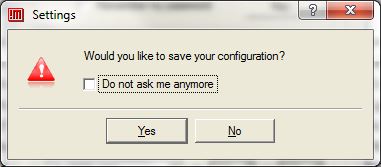
Hit
Ok and save the configuration, the Session, as, again for example, UNLV.
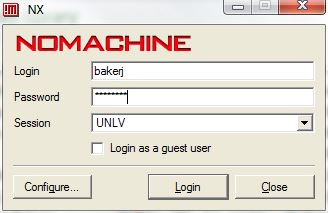
Enter
your password for the server and Login as seen below.
The
remote desktop will start as seen below.

X Error
of failed request
when trying to start Cadence IC51 in NX client (you need to install the
75 dpi
fonts if you are
going
to run Cadence IC51).