Lab 1 - ECE 421L 

Authored by Christopher Mikhael,

8/24/2014 


PRE- LAB

Lab description:

snip1.JPG


Add a return to the listing of your labs


Return to EE 421L Labs


POST-LAB

Setup of Cadence from a MAC:

This tutorial assumes a username and password for the SFTP server have already been obtained.

First open the Terminal window on your mac and type the following command to SSH into the server:

                        ssh -Y username@csimcluster.ee.unlv.edu


A prompt for password should appear.
If this is the first time logging into the Cadence server, you will be prompted to change your password.

Terminallogin


After this is complete download FileZilla and enter the following credentials to ease accessing the server filesystem.
Use FileZilla application to sftp using the following info:

Host: sftp://csimcluster.ee.unlv.edu
Username: (Provided username)
Password: (Provided Password)
Port: 22


After this is set download the NCSU CDK version 1.6.0 by registering with an email.
Drag the compressed NCSU CDK file into the directory to the server home directory as seen below:

filezilla NCSU

Next 
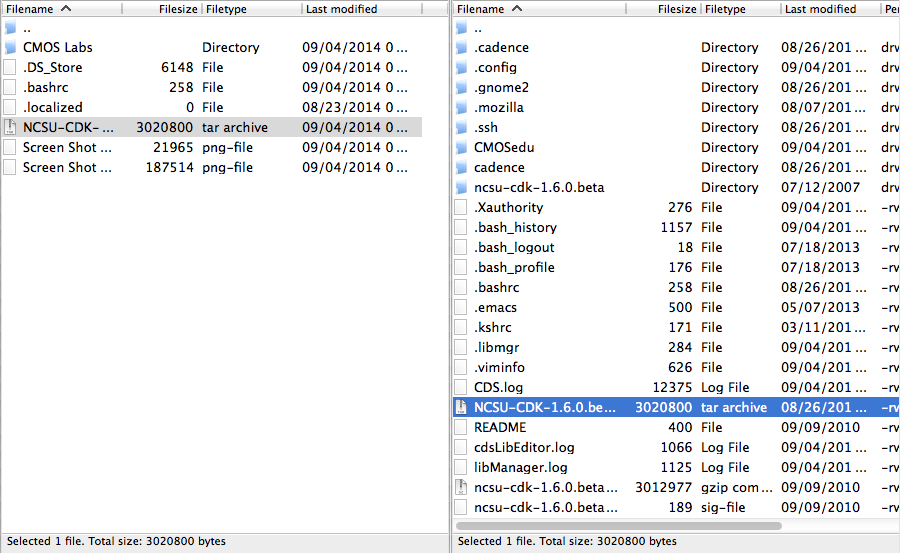
we will have to edit the .bashrc file. To do this find the .bashrc in the Filezilla server directory. Drag this file to the Desktop of the computer directory. Here the file can be edited using a standard text 
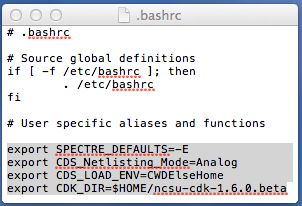
editor. When the file is opened add the following:

export SPECTRE_DEFAULTS=-E
export CDS_Netlisting_Mode=Analog
export CDS_LOAD_ENV=CWDElseHome
export CDK_DIR=$HOME/ncsu-cdk-1.6.0.beta

As seen below:

bashrc file


Save the file and then drag the file back into the Cadence server and overwrite old file.
Then in the terminal window enter the following: “. .bashrc” to resource the server


Create a directory within the Cadence server called CMOSedu
Copy over the ncsu-cdk-1.6.0.beta/cdssetup into CMOSedu directory
Using filezilla change the names of the following files by adding a period to the beginning of each

cdsinit       >>>      .cdsinit
simrc         >>>      .simrc
cdsenv       >>>      .cdsenv

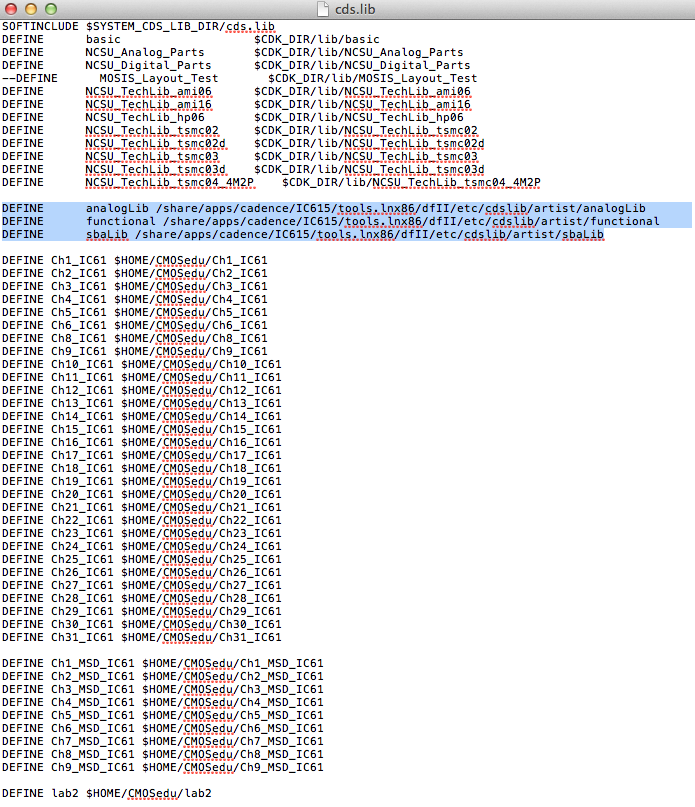
In the CMOSedu directory open the cds.lib file and add the following

DEFINE      analogLib /share/apps/cadence/IC615/tools.lnx86/dfII/etc/cdslib/artist/analogLib
DEFINE      functional /share/apps/cadence/IC615/tools.lnx86/dfII/etc/cdslib/artist/functional
DEFINE      sbaLib /share/apps/cadence/IC615/tools.lnx86/dfII/etc/cdslib/artist/sbaLib


cdslib


Next find and open the .cdsinit file from the CMOS directory and add the following to the bottom of the file:


                                envSetVal("asimenv.startup" "simulator" 'string "spectre")

Next go to $HOME/ncsu-cdk-1.6.0.beta/lib/NCSU_TechLib_ami06 and delete the following:


divaDRC.rul
divaEXT.rul
divaLVS.rul


Unzip diva_rul_files.zip and upload the contents back into directory above.


Cadence Tutorial

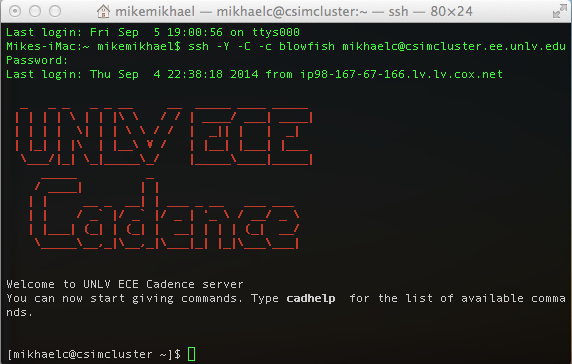
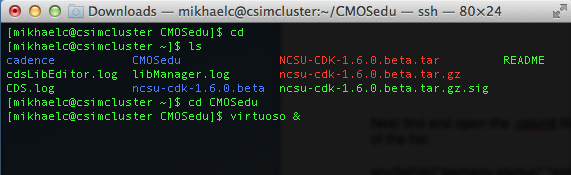
Now it is time to enter the Cadence GUI. To do this first enter the CMOSedu directory from terminal using the cd command:
                    “cd CMOSedu

Then type in the command "virtuoso &" to enter the Cadence GUI:

virtuoso
    
The File manager and Command window should open:
Lets Create a New Library within the Library manager:
Go to: File>>New>>Library

Set Tutorial_1 for the name
and Attach to existing tech library:
AMI.60u C5N
Then press OK


New Library

After creating the Directory, we have to define the path within css.lib by entering the following:
                   
                    DEFINE Tutorial_1 /home/mikhaelc/CMOSedu/Tutorial_1

After this file is edited and saved within the server, go back to the Library manager and highlight Tutorial_1, then go to File>>New>>Cell View

Enter same values as below

R_div'


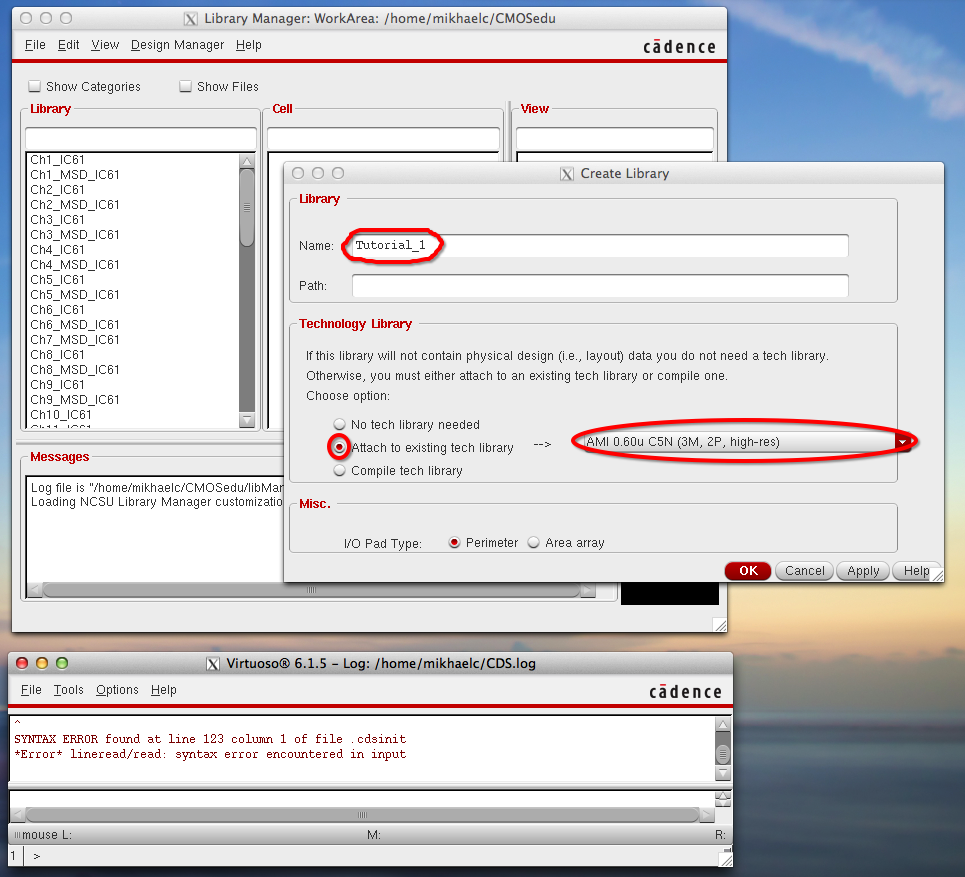
After pressing OK the Schematic Editor should appear


Go to Create>>Instance
Use the Component browser to select part parts to the Add instance window

Library:  NCSU_Analog_Parts
Select R_L_C
Select res
Then change resistance to 10K Ohms
As shown below

Add instance


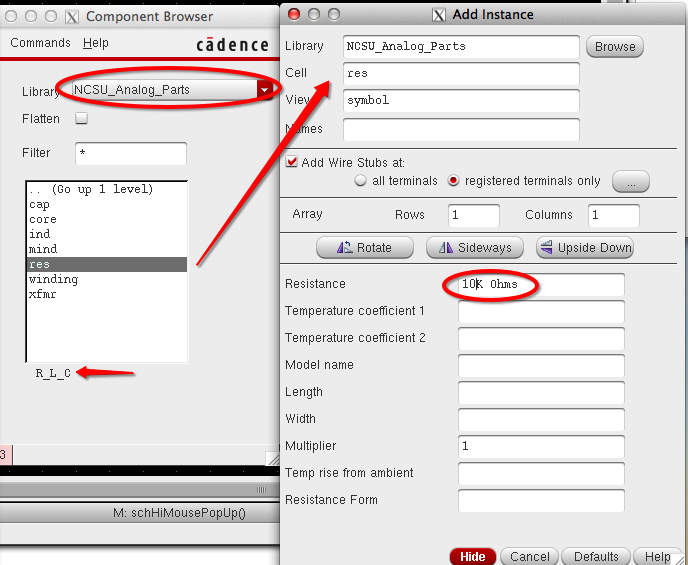
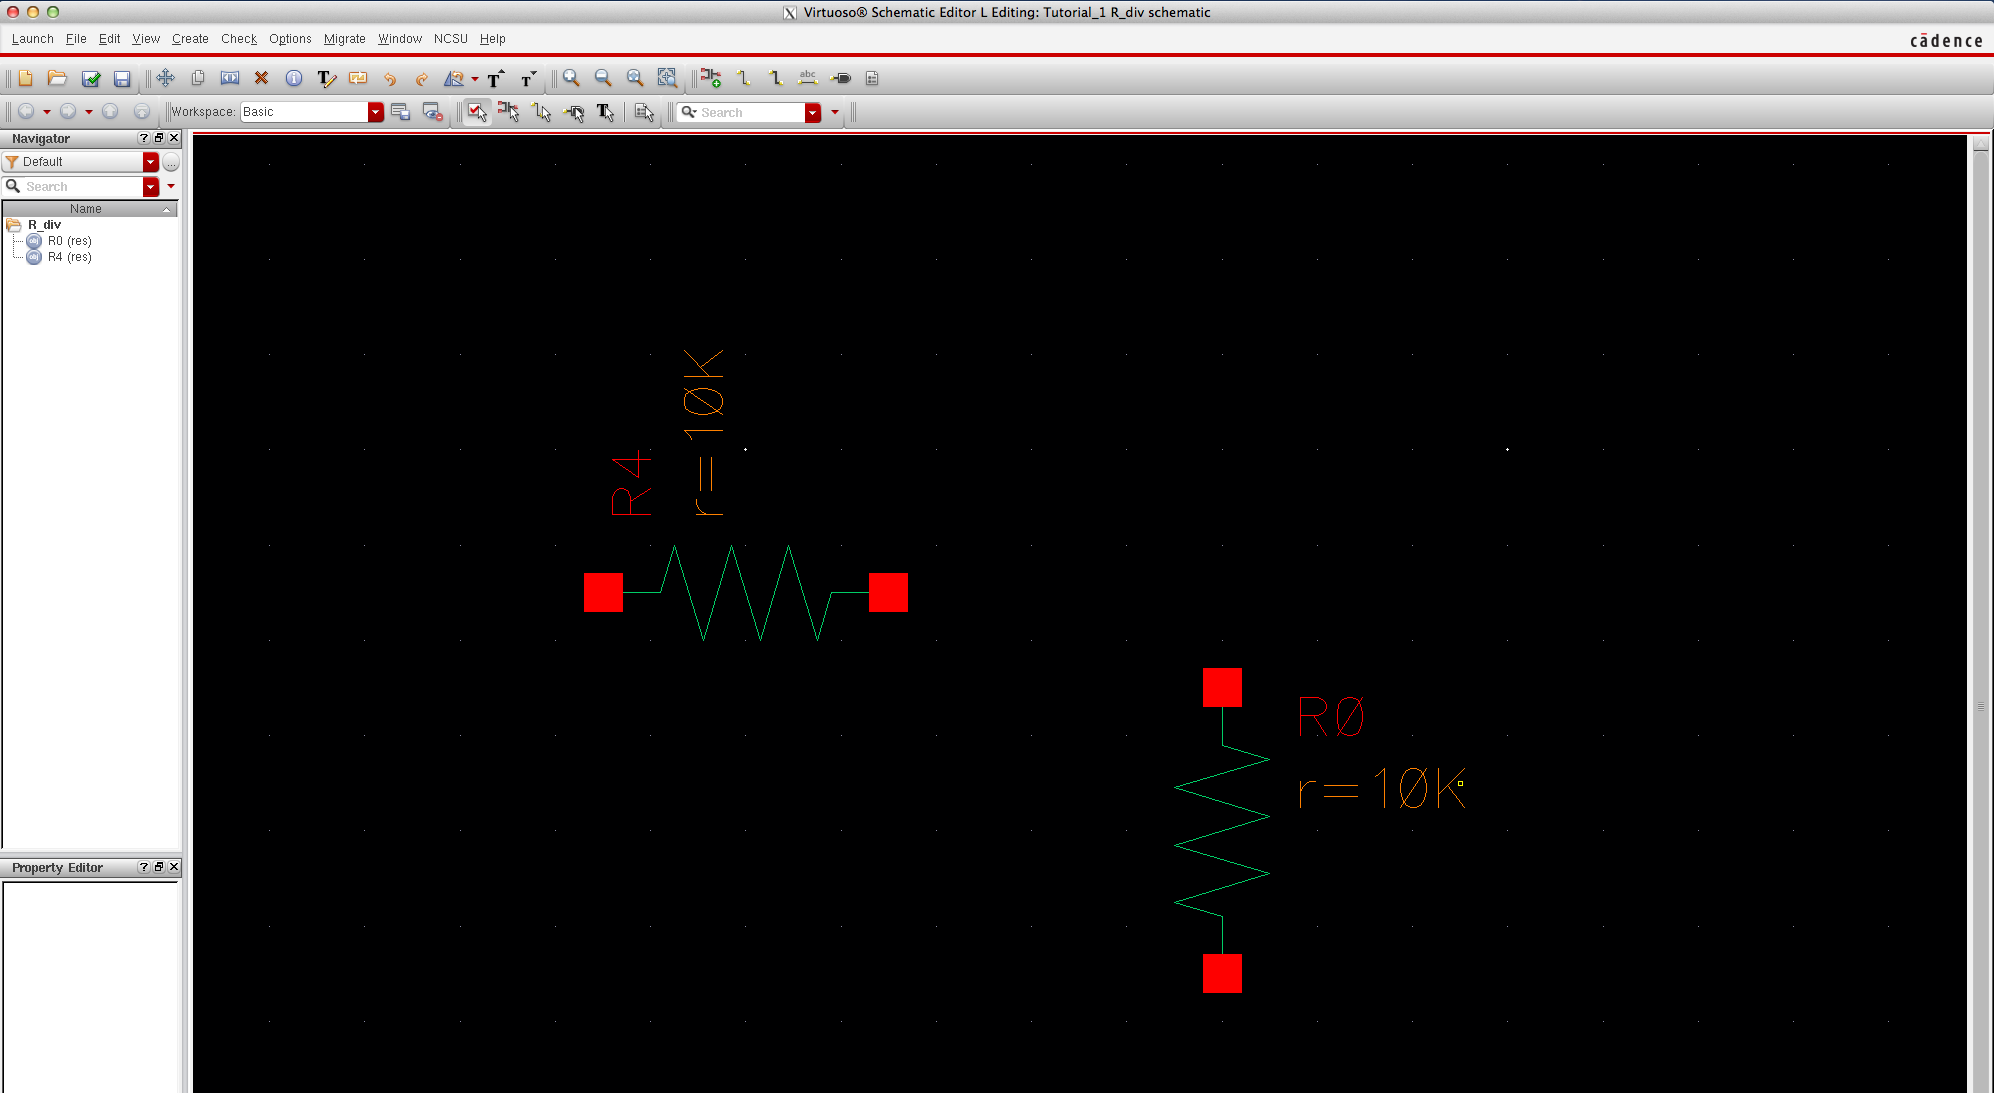
After the instance is selected place two resistors in the schematic view by clicking on the canvus. Right click to rotate and Esc exits out o the Instance.

schematic

Then add a GND by creating another instance:
In the Component browser got to:
Supply_Nets and select gnd
And place on the schematic

Also add a DC voltage by creating another instance:
In the Component Browser select:
Voltage_Source and select VDC
Change the DC voltage to 1

Then use the wire button to connect the nodes to create the circuit as shown below:


Then use "l" to name the input and output of the circuit. Then click the check save button to save your work.


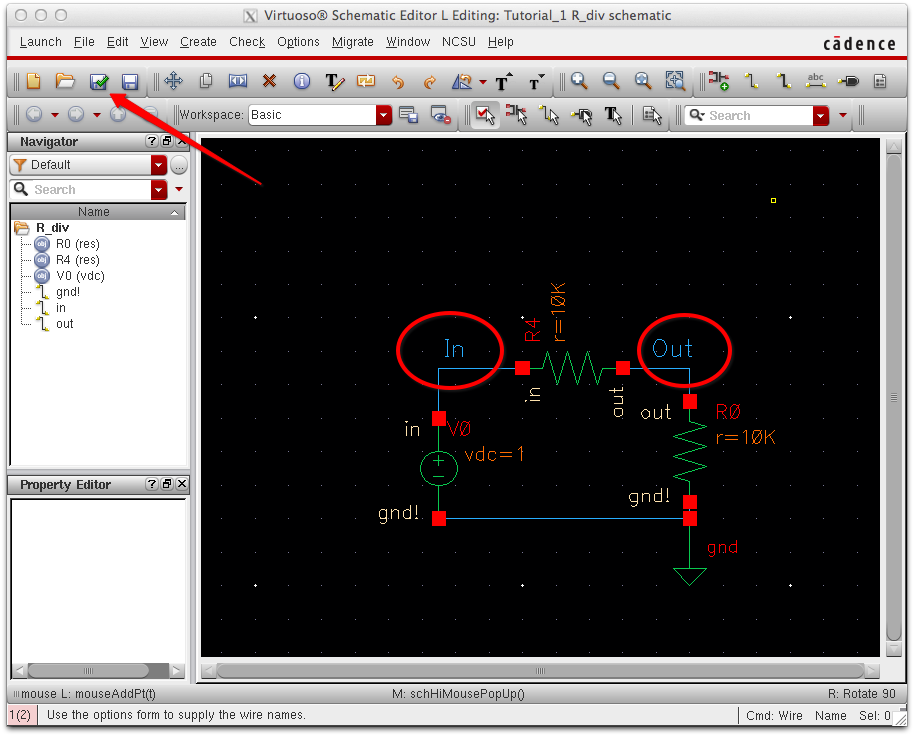
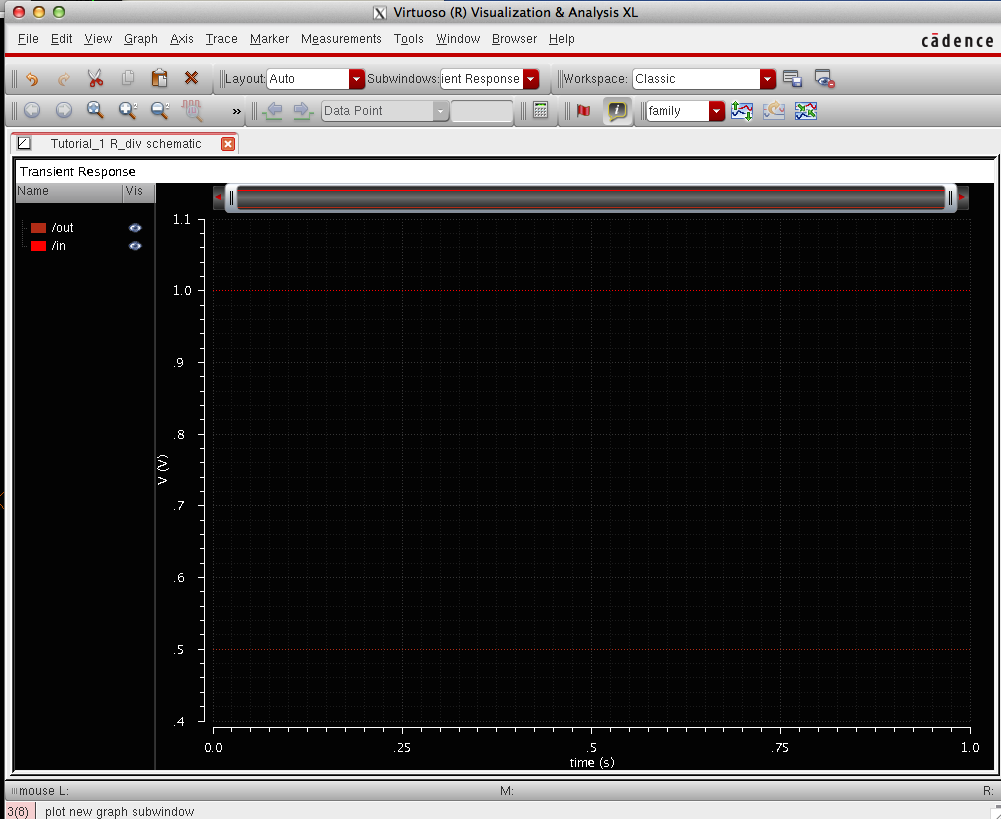
Now its time to run the simulation:


Go to: Launch>>ADE L

A window should open up


Go to Setup>>simulation/directory/host

Make sure simulator is set to spectre


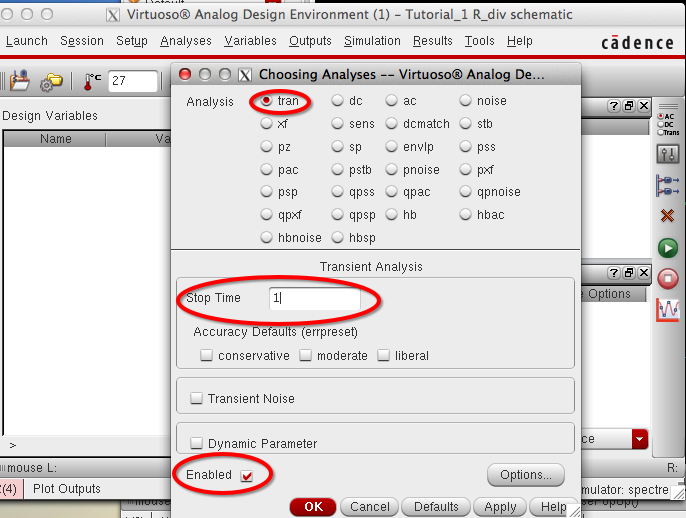
Go to: Analyses>>Choose and enter the following


Next go to output>>To be plotted>> select on schematic
Then choose the two outputs to be plotted on the schematic view

Next Click Sessions >>Save State, then select cell view

Now Simulations should be ready, Hit the green play button on the ADE to begin simulation

The following should appear:


This is the End of the Lab


To save the web .htm work it is good practice to edit the files on the desktop keeping all screenshots in the same folder. Then upload the files onto the ftp server. Zip the files on desktop and save them either in the cloud or a storage device.