Notes for setting-up the Mentor Tools Out-of-the-box
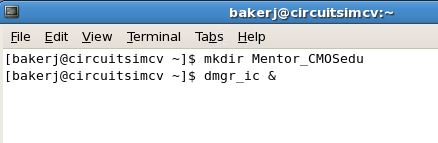
In your home directory make a directory called, for example, "Mentor_CMOSedu" using the
command "mkdir Mentor_CMOSedu" as seen below.
***Note that the names and paths are case sensitive!***
Start the Pyxis Project Manager using "dmgr_ic &" as seen below.
- dmgr_ic is short for Design Manager IC
- adding the "&" after the command starts the program in the background so the terminal can be used for other commands (the terminal is not locked)
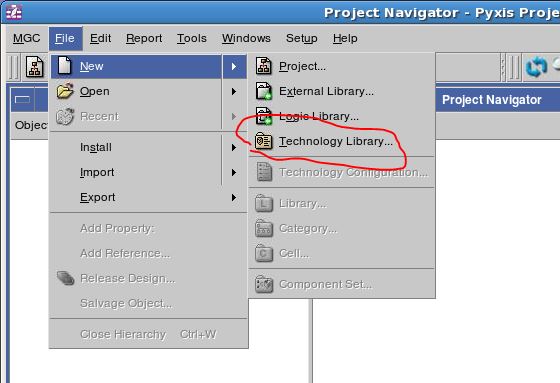
Use File -> New -> Technology Library... as seen below.
Enter the path seen below and then hit OK.
The technology library is named "CMOSedu_tech."
Note that $HOME is equivalent to your home directory.
For me $HOME is the same as the path /home/bakerj/

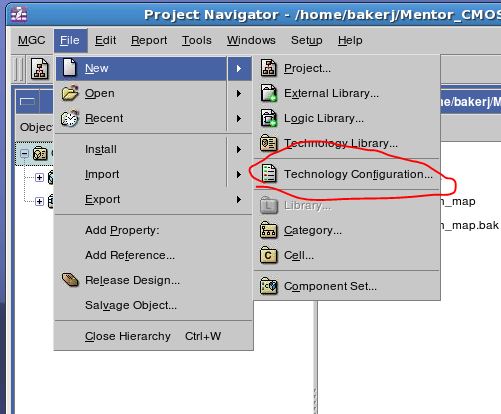
Next select File -> New -> Technology Configuration... as seen below.
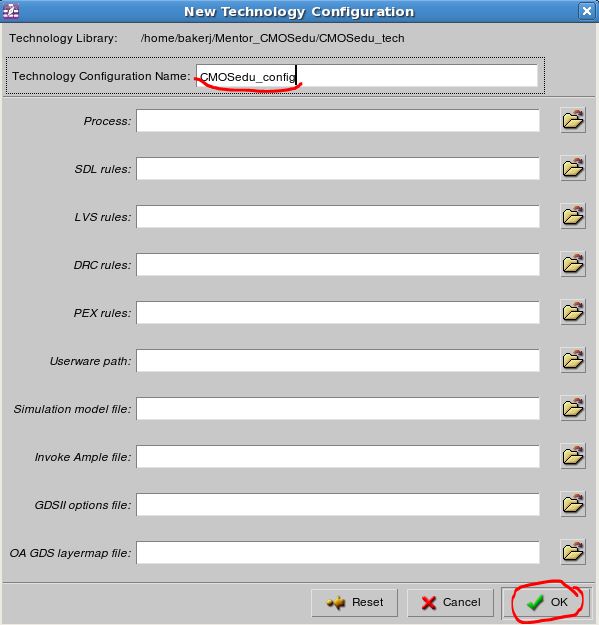
Name the technology configuration "CMOSedu_config" and then hit OK.
Next create a new project.
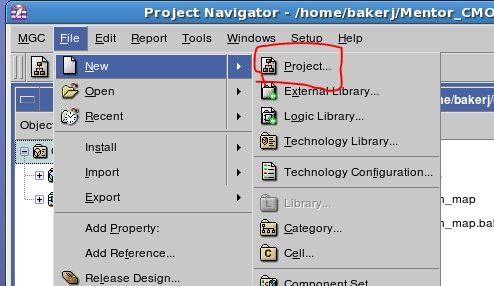
Call this project "CMOSedu_examples".
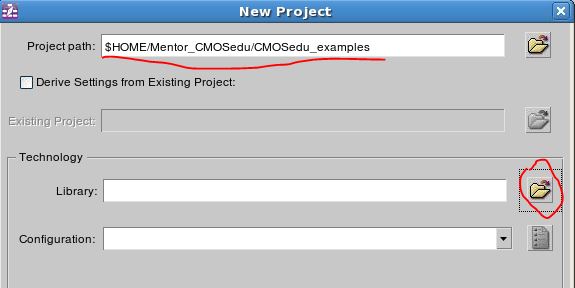
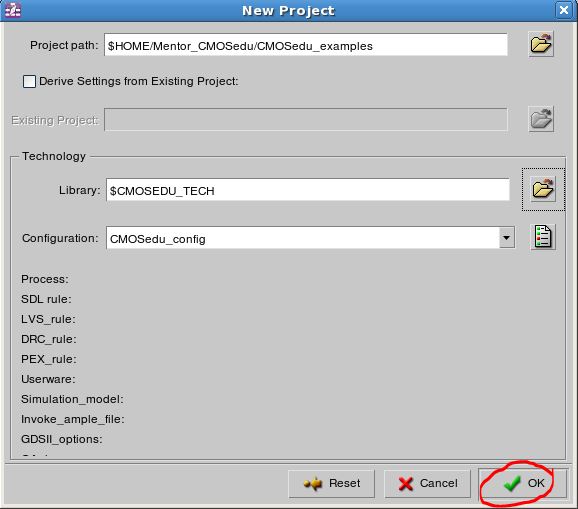
Set the Project path and name as seen below.
This project will contain each chapters' examples from the books.
Select the library technology using the open folder icon circled below.
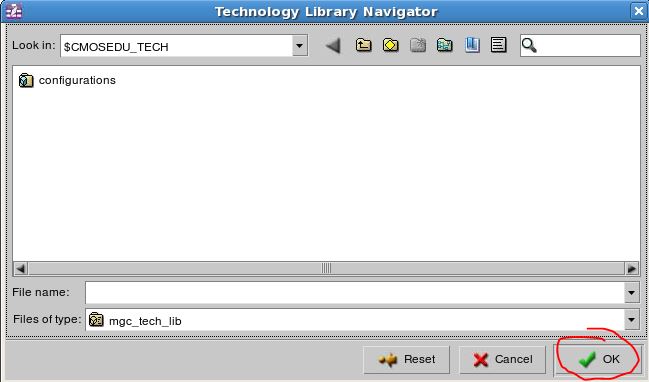
A window will open. Click on OK.
Click OK again.
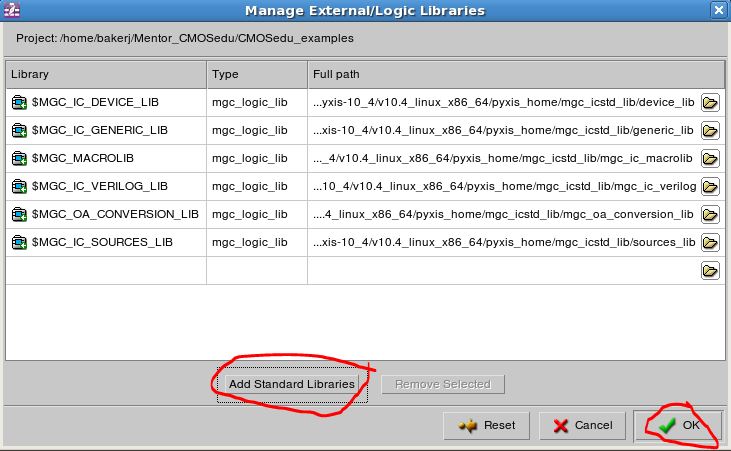
Next select the "Add Standard Libraries" and then OK.
If these libraries are not added at this point then basic components, like a resistor, won't be available when drafting a schematic.
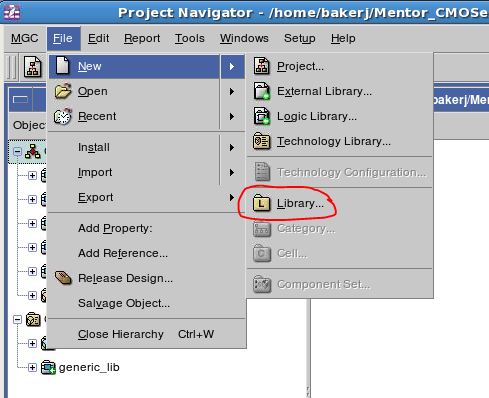
Next creat a Library using File -> New -> Library as seen below.
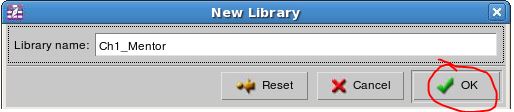
Call this library, for example, Ch1_Mentor (Ch1 examples).
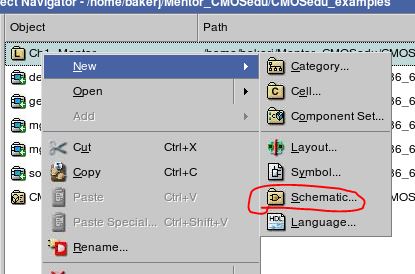
Right-click on the library and select Schematic... as seen below.
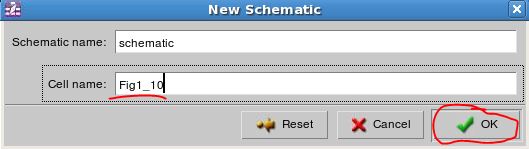
Call the schematic "Fig1_10" as seen below.
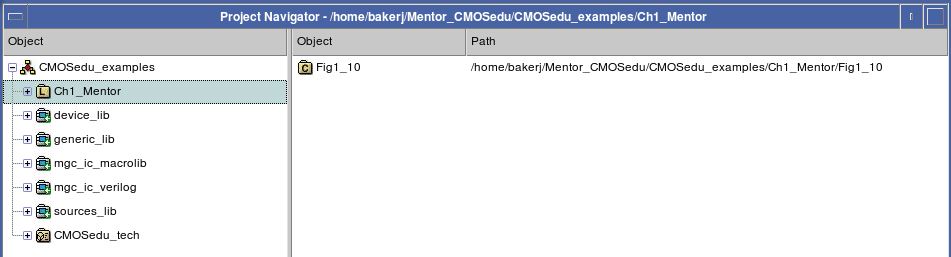
Let's pause and show the contents of the Project Navigator.
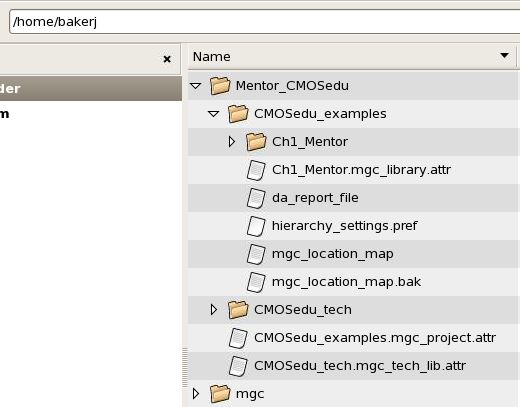
and the file browser to show the directory listing.
In order to provide the proper paths to the tools add
Note that the period at the beginning of the filename makes the file a "Hidden File" so ensure that you can view Hidden Files.
export MGC_HOME=/usr/mentor
export MGC_AMS_HOME=$MGC_HOME/ams
export CALIBRE_HOME=$MGC_HOME/calibre/ixl_cal_2012.3_31.26
export CMOSEDU_TECH=$HOME/Mentor_CMOSedu/CMOSedu_tech
export MGC_AMS_HOME=$MGC_HOME/ams
export CALIBRE_HOME=$MGC_HOME/calibre/ixl_cal_2012.3_31.26
export CMOSEDU_TECH=$HOME/Mentor_CMOSedu/CMOSedu_tech
If using the C Shell then change the above export to setenv and the = to a space and add the following to your .cshrc file.
setenv MGC_HOME /usr/mentor
setenv MGC_AMS_HOME $MGC_HOME/ams
setenv CALIBRE_HOME $MGC_HOME/calibre/ixl_cal_2012.3_31.26
setenv CMOSEDU_TECH $HOME/Mentor_CMOSedu/CMOSedu_tech
setenv MGC_AMS_HOME $MGC_HOME/ams
setenv
setenv
Note that if you don't have the MGC_AMS_HOME enviornment variable set then Eldo won't run (it won't be found when called by Pyxis).
Also, if you don't have the CMOSEDU_TECH enviornment variable set then you'll get an error in the Pyxis Project Manager, $CMOSEDU_TECH, if downloading and trying to use the books' examples in Mentor_CMOSedu.zip.
Return to Mentor Graphics at CMOSedu.com